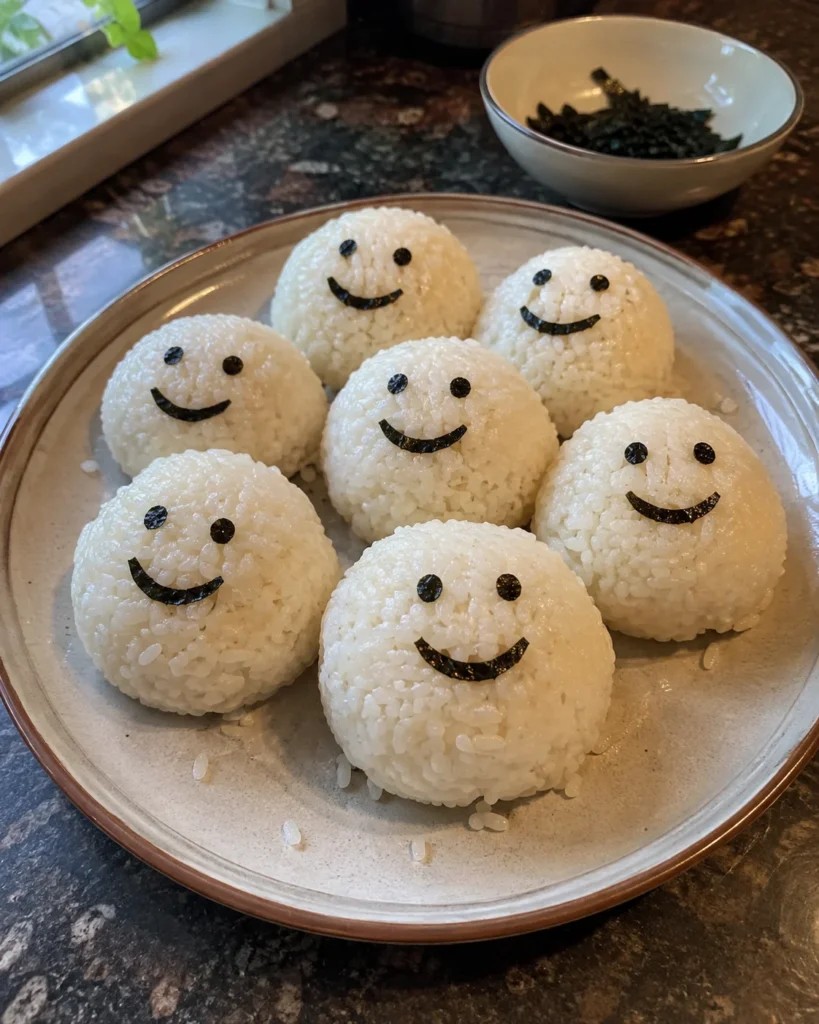
If your kids love anything cute, silly, or a little bit extra, this emoji rice balls recipe is about to become a regular in your kitchen. It’s a simple, playful twist on Japanese onigiri, made with sticky rice and a few snips of nori seaweed shaped into happy faces.
You don’t need any fancy tools or Japanese cooking experience to make emoji rice balls. Just cooked rice, a pair of scissors, and a little patience for shaping. They’re perfect for lunchboxes, after-school snacks, birthday parties, or a fun weekend activity with the kids.
Save this one for busy days when you need something simple, cozy, and family-friendly. Once you’ve made a batch, you’ll have a go-to trick for turning plain leftover rice into something your kids actually get excited to open at lunchtime.
Quick Recipe Snapshot
- Prep time: 15 minutes
- Cook time: 20 minutes
- Total time: 35 minutes
- Servings: 4 (about 6–8 rice balls)
- Difficulty level: Beginner-friendly
- Best for: Lunchboxes, snacks, parties, kid-friendly cooking projects
- Main method: Stovetop rice + hand-shaping
- Flavor profile: Mild, savory, lightly seasoned
Table of Contents
Why You’ll Love This Emoji Rice Balls
- Beginner-friendly — no special equipment or skills needed
- Only a handful of pantry staples required
- Kids love helping shape and decorate them
- Great for lunchboxes, parties, or after-school snacks
- Easy to customize with different fillings and faces
- Naturally gluten-free and easy to make dairy-free
What Makes This Recipe Work
The magic behind emoji rice balls is short-grain rice. Unlike long-grain rice, short-grain (sometimes labeled “sushi rice”) is naturally sticky once cooked, which means it holds its shape without any glue, paste, or fancy binding. A quick seasoning of rice vinegar, sugar, and salt adds flavor without overpowering little taste buds.
The “emoji” part comes from simple pieces of nori seaweed, cut into eyes and mouths. Because the rice is naturally sticky, the nori pieces stay put with no extra effort. That’s really the whole trick — sticky rice plus a few snips of seaweed equals a face.
Ingredients You’ll Need
- 2 cups uncooked short-grain sushi rice — this is what gives emoji rice balls their sticky, shapeable texture
- 2 cups water — for cooking the rice on the stovetop
- 2 tablespoons rice vinegar — adds a light tang, just like traditional onigiri seasoning
- 1 tablespoon sugar — balances the vinegar and appeals to kids’ palates
- 1 teaspoon salt, plus extra for wetting hands — seasons the rice and helps prevent sticking during shaping
- 4–5 sheets nori (seaweed) — cut into simple face shapes for the “emoji” look
- Optional filling: furikake seasoning, flaked cooked salmon, or a small spoonful of cream cheese
Ingredient Notes and Easy Swaps
Short-grain rice really matters here — long-grain rice like jasmine or basmati won’t hold together the same way. If you’re unsure which bag to grab, this Carolina Rice guide to rice varieties is a helpful reference for spotting short-grain rice at the store.
No rice vinegar on hand? A small splash of white vinegar with an extra pinch of sugar works in a pinch, though the flavor will be slightly sharper. Furikake is optional but adds a nice savory boost — look for a sesame or salmon flavor in the Asian foods aisle of most grocery stores. If nori feels intimidating, start with just two simple dot eyes and a curved mouth; you don’t need elaborate designs for these emoji rice balls to look adorable.
How to Make Emoji Rice Balls
- Rinse the rice. Place the rice in a bowl, cover with cold water, and swish it around until the water turns cloudy. Drain and repeat 4–5 times, until the water runs mostly clear. This step keeps the rice from turning gummy.
- Cook the rice. Combine the rinsed rice and 2 cups water in a pot. Bring to a boil, then reduce to a low simmer, cover, and cook for 15 minutes. Turn off the heat and let it rest, covered, for 10 minutes.
- Season the rice. While the rice is still warm, gently fold in the rice vinegar, sugar, and salt. Let it cool just enough to handle comfortably — it should still be warm, not hot.
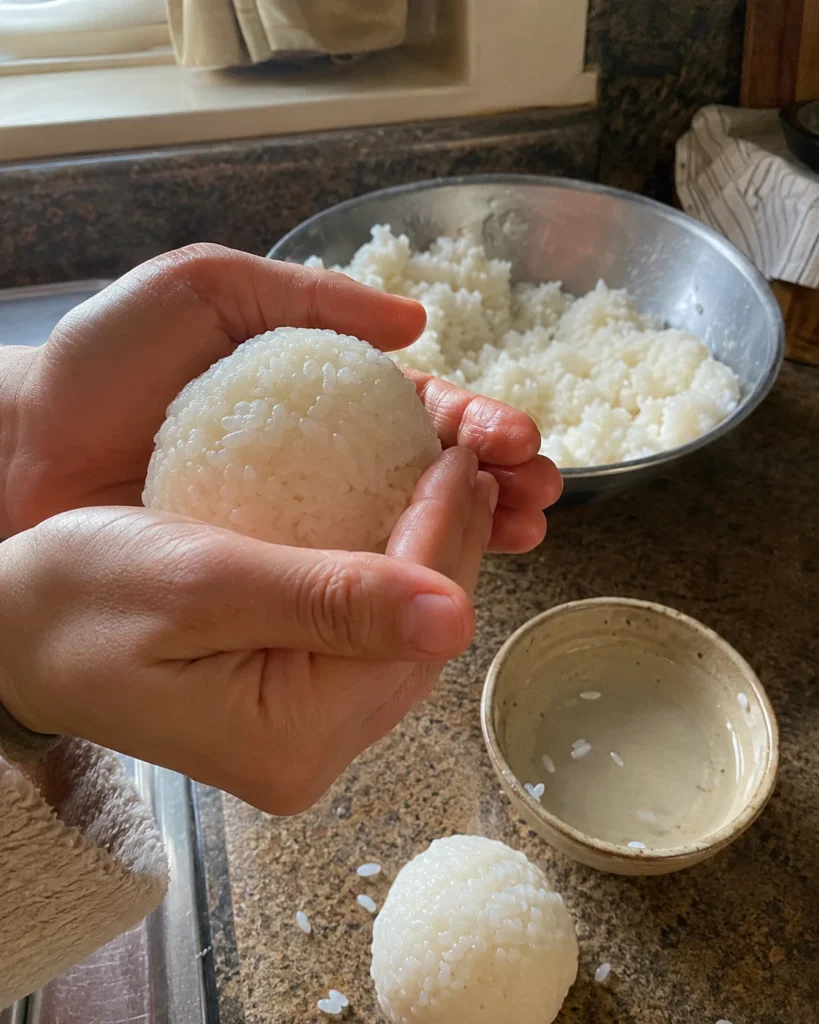
- Wet your hands. Dip your hands in a small bowl of salted water. This keeps the rice from sticking to your fingers as you shape it.
- Shape the balls. Scoop about ⅓ cup of rice into your palm and gently press and roll it into a ball or slightly flattened oval. If using a filling, tuck a small spoonful into the center before sealing the rice around it.
- Cut the nori faces. Using kitchen scissors, snip small nori pieces into simple eyes, mouths, and any extra details like hearts or stars.
- Decorate. Press the nori pieces gently onto each rice ball. The natural stickiness of the rice holds them in place — no glue or paste needed.
- Serve or pack. Arrange your finished emoji rice balls on a plate or tuck them into a lunchbox once fully cooled.
Beginner Tips for Best Results
- Let the rice cool slightly before shaping — hot rice is harder to handle and can steam-cook your hands.
- Keep a small bowl of salted water nearby to re-wet your hands between rice balls.
- Use kitchen scissors, not a knife, for the cleanest nori cuts.
- Work in small batches so the rice doesn’t dry out while you shape everything.
- If the rice feels crumbly instead of sticky, it likely wasn’t rinsed enough before cooking.
Common Mistakes to Avoid
- Using the wrong rice. Long-grain rice won’t stick together well enough to hold an emoji rice balls shape — stick with short-grain or sushi rice.
- Skipping the rinse. Unrinsed rice can turn gummy or clump unevenly once cooked.
- Shaping rice that’s too hot. This makes the rice ball fall apart and can be uncomfortable to handle. Let it cool slightly first.
- Overfilling the center. Too much filling makes it hard to seal the rice ball closed. A small spoonful goes a long way.
- Applying nori too early. Wait until the rice ball is fully shaped and slightly set before adding the nori pieces, or they can slide out of place.
Easy Variations
- Sweeter version: Skip the filling and add a touch more sugar to the seasoning for a milder, kid-friendly flavor.
- Protein-packed version: Fold in flaked cooked salmon or shredded chicken for a heartier lunchbox option.
- Party version: Use different nori shapes for winking faces, hearts, and stars to match a birthday theme.
- Kid-friendly version: Let kids press their own nori faces on — it turns snack prep into a fun activity.
- Lighter version: Use less salt and skip the filling for a simple, plain rice ball perfect for very young eaters.
What to Serve With Emoji Rice Balls
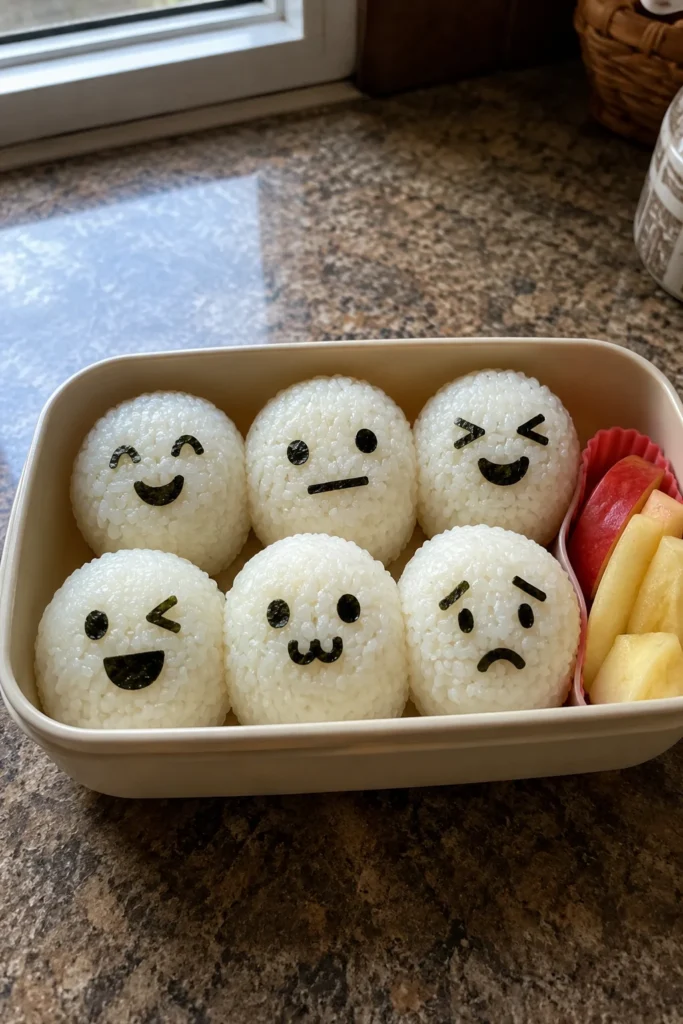
Emoji rice balls pair well with other easy lunchbox and dinner favorites. Try them alongside a scoop of Egg Fried Rice for a heartier meal, or tuck one next to Chicken & Cheese Lunchbox Muffins for a well-rounded lunch.
For a fun family dinner night, serve emoji rice balls next to General Tso’s Chicken or a batch of Potsticker Stir Fry. If you’re planning a kids’ party spread, they also go great with playful favorites like Dino Nuggets with Volcano Ketchup or a simple Fruit Quesadilla on the side.
Make-Ahead Tips
You can cook and season the rice up to a day ahead and store it covered in the fridge. Let it come closer to room temperature before shaping, since cold rice is harder to mold. Nori faces are best cut and applied right before serving so they stay crisp instead of softening.
How to Store Emoji Rice Balls
Store leftover emoji rice balls in an airtight container in the refrigerator for up to 2 days. Because rice can carry food safety risks if left out too long, it’s best to refrigerate them within an hour of making them — the USDA’s guidance on leftovers and food safety is a good resource if you want more detail on safe rice handling. For the best texture, remove the nori pieces before refrigerating and add fresh ones when you’re ready to eat.
Can You Freeze Emoji Rice Balls?
Yes, but with one adjustment: freeze the plain rice balls without the nori faces. Wrap each one individually in plastic wrap, place in a freezer bag, and freeze for up to 1 month. Thaw at room temperature or in the fridge, then add fresh nori decorations once thawed, since frozen nori can turn soggy and lose its shape.
How to Reheat
To reheat, microwave a rice ball (without nori) for 20–30 seconds, or until warmed through, then let it cool slightly before adding fresh nori. Avoid reheating rice balls that already have nori attached, as the seaweed can become chewy or fall off.
Nutrition Notes
Emoji rice balls are a simple, mostly carbohydrate-based snack, with modest calories per ball depending on size and filling. Adding protein-rich fillings like salmon or chicken will increase the protein content. Exact nutrition values will vary based on your specific ingredients and portion sizes, so use a nutrition calculator if you need precise numbers for a particular diet.
Frequently Asked Questions – Emoji Rice Balls
Can I make emoji rice balls without a rice cooker?
Yes! This recipe uses a simple stovetop method, so no rice cooker is needed. Just be sure to rinse the rice well and let it rest after cooking for the stickiest texture.
What kind of rice works best for emoji rice balls?
Short-grain rice, often labeled “sushi rice,” works best because it’s naturally sticky and holds its shape once cooked. Long-grain rice won’t bind together the same way.
Can I make these ahead for a lunchbox the next day?
You can cook and season the rice a day ahead, but it’s best to shape and decorate emoji rice balls closer to serving time so the nori stays crisp and the rice stays fresh.
Are emoji rice balls safe for young kids?
Plain, well-shaped emoji rice balls are generally fine for toddlers and young kids, but keep pieces bite-sized and supervise little ones to avoid choking hazards, especially with any added fillings.
Do I need special tools to make emoji rice balls?
No special tools are required — just your hands, a pair of kitchen scissors for the nori, and a small bowl of salted water for shaping.
Can I use flavored rice for this recipe?
Plain seasoned rice works best so the nori faces stand out clearly, but a light sprinkle of furikake seasoning is a popular way to add extra flavor without overwhelming the design.
How long do emoji rice balls last in the fridge?
Emoji rice balls will keep for up to 2 days in an airtight container in the refrigerator when stored promptly after cooling.
Final Thoughts – Emoji Rice Balls
Emoji rice balls are proof that a fun kitchen project doesn’t need to be complicated. With a pot of rice, a few snips of nori, and a little patience, you can turn an ordinary lunchbox into something your kids will actually be excited to open. Give this one a try — it might just become a new family favorite.
Print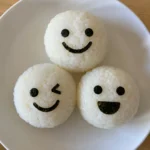
Emoji Rice Balls
- Total Time: 35 minutes
- Yield: 4 servings (6-8 rice balls) 1x
Description
A fun, beginner-friendly recipe for emoji rice balls made with sticky short-grain rice and simple nori faces. Perfect for lunchboxes, snacks, and parties.
Ingredients
2 cups uncooked short-grain sushi rice
2 cups water
2 tablespoons rice vinegar
1 tablespoon sugar
1 teaspoon salt, plus extra for wetting hands
4–5 sheets nori (seaweed)
Optional filling: furikake, flaked cooked salmon, or cream cheese
Instructions
1. Rinse the rice until the water runs mostly clear.
2. Combine rice and water in a pot; bring to a boil, then reduce to a simmer, cover, and cook 15 minutes.
3. Turn off the heat and let the rice rest, covered, for 10 minutes.
4. While still warm, gently fold in the rice vinegar, sugar, and salt.
5. Wet your hands with salted water to prevent sticking.
6. Scoop about 1/3 cup of rice and shape into a ball or oval, tucking in filling if using.
7. Cut nori into simple face shapes using kitchen scissors.
8. Press the nori pieces onto each rice ball to form the emoji face.
9. Serve or pack into a lunchbox once fully cooled.
Notes
Use short-grain rice for the best sticky texture; long-grain rice will not hold together.
Add nori just before serving so it stays crisp instead of softening.
Store leftovers in an airtight container in the fridge for up to 2 days.
- Prep Time: 15 minutes
- Cook Time: 20 minutes
- Category: Snack, Lunch
- Method: Stovetop
- Cuisine: Japanese-inspired, American-adapted
Nutrition
- Serving Size: 2 rice balls (150g)
- Calories: 260 kcal
- Sugar: 3g
- Sodium: 320mg
- Fat: 1g
- Saturated Fat: 0g
- Unsaturated Fat: 0.5g
- Trans Fat: 0g
- Carbohydrates: 56g
- Fiber: 1g
- Protein: 5g
- Cholesterol: 0mg
Print and Save This Emoji Rice Balls
If this recipe fits your weeknight routine, print it or save it so you can come back to it the next time you need an easy homemade meal. Emoji rice balls are simple enough to whip up on a Tuesday night but fun enough to feel like a special treat.