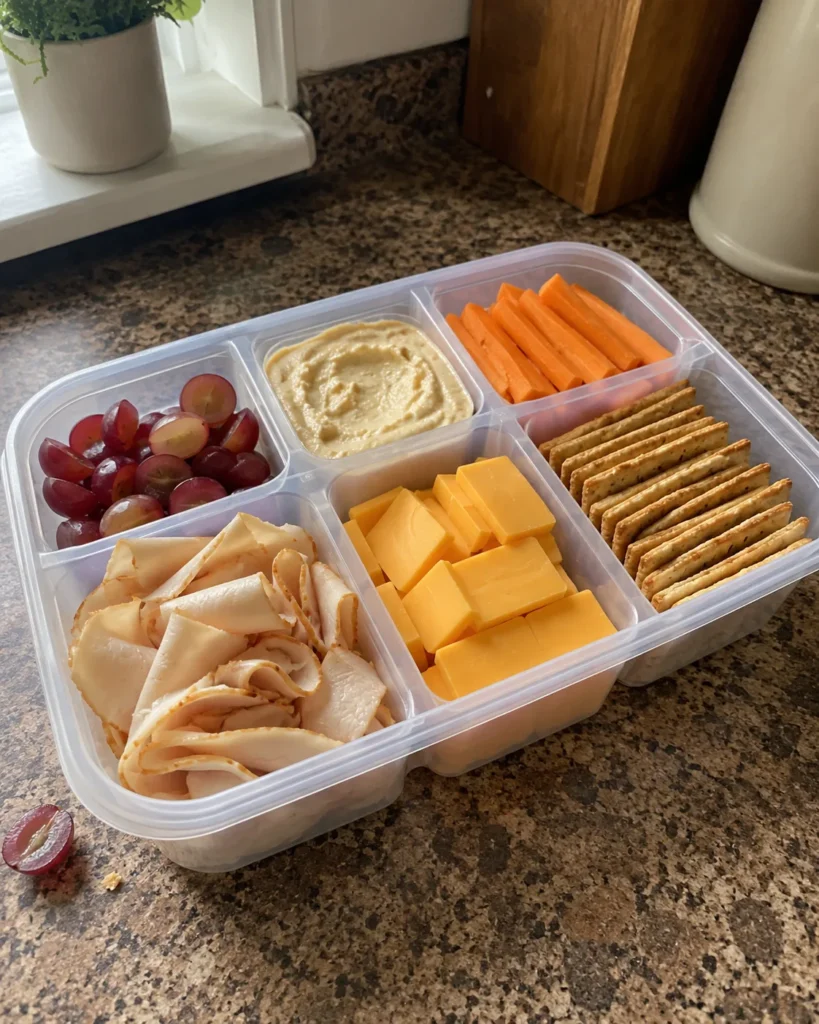
If lunchtime at your house usually means a store-bought Lunchable or a scramble through the fridge, this DIY Snacky Lunch Box is about to become your new go-to. It’s not one fixed recipe — it’s a simple, repeatable formula that lets you build a colorful, balanced lunch in about 15 minutes using things you probably already have on hand.
This recipe works for packed school lunches, road trips, picnics, or a lazy weekend lunch at home. Kids love the variety, and grown-ups love how little effort it takes.
Save this one for busy days when you need something simple, cozy, and family-friendly.
Quick Recipe Snapshot
- Prep time: 15 minutes
- Cook time: 0 minutes (no-cook!)
- Total time: 15 minutes
- Servings: 4 lunch boxes
- Difficulty level: Beginner
- Best for: School lunches, picnics, road trips, meal prep
- Main method: No-cook assembly
- Flavor profile: Customizable — salty, sweet, fresh, and crunchy all in one box
Table of Contents
Table of Contents
Why You’ll Love This DIY Snacky Lunch Box
- No cooking required — just slicing, portioning, and packing.
- Every box is customizable, so picky eaters actually eat their lunch.
- It costs a fraction of what you’d pay for store-bought lunch kits.
- You control the ingredients, so it’s easy to keep things simple and wholesome.
- It comes together in one 15-minute session, even on your busiest morning.
- This is one of those recipes beginner cooks can nail on the very first try.
What Makes This DIY Snacky Lunch Box Work
A great DIY Snacky Lunch Box comes down to balance, not a fixed ingredient list. Every box gets one item from four simple categories: a protein, a crunchy carb, a fruit, and a veggie with a dip.
That structure means your child (or you!) gets steady energy through the afternoon instead of a sugar crash. It also means you’ll never run out of ideas, since you can rotate what goes in each category all week long.
Keeping wet ingredients like dip or cut fruit away from dry ones like crackers is the other secret. It’s a small step that keeps everything crisp until lunchtime.
Ingredients You’ll Need
This base combo makes 4 lunch boxes. Feel free to swap anything based on what’s in your fridge.
- Deli turkey or ham (8 oz): The protein base — it’s filling and pairs well with almost any cheese or dip.
- Sliced cheese or cheese sticks (8 slices or 4 sticks): Adds calcium and a little extra staying power.
- Whole grain crackers (24, about 6 per box): The crunchy carb — look for a sturdy cracker that won’t crumble in transit.
- Grapes or strawberries (2 cups, halved if large): The fruit category — naturally sweet, no added sugar needed.
- Carrot sticks or cucumber slices (2 medium carrots or 1 cucumber): Fresh crunch and color.
- Hummus, ranch, or yogurt dip (½ cup, or 4 small cups): Makes the veggies far more likely to actually get eaten.
- Optional treat (pretzels, a few squares of dark chocolate, or a granola bar): A small extra for balance, not a requirement.
Ingredient Notes and Easy Swaps
- Protein: Swap deli meat for a hard-boiled egg, rotisserie chicken, or canned tuna if that’s what you have.
- Crackers: Any sturdy whole grain cracker works — just avoid delicate, crumbly styles for a DIY Snacky Lunch Box that travels well.
- Fruit: Apple slices with a squeeze of lemon juice, orange segments, or berries all work beautifully here.
- Dip: Skip the dip entirely if your kids prefer plain veggies — it’s optional, not essential.
- Dairy-free or nut-free: Use dairy-free cheese and skip nut butters; almost every component has an easy allergy-friendly swap.
How to Make a DIY Snacky Lunch Box
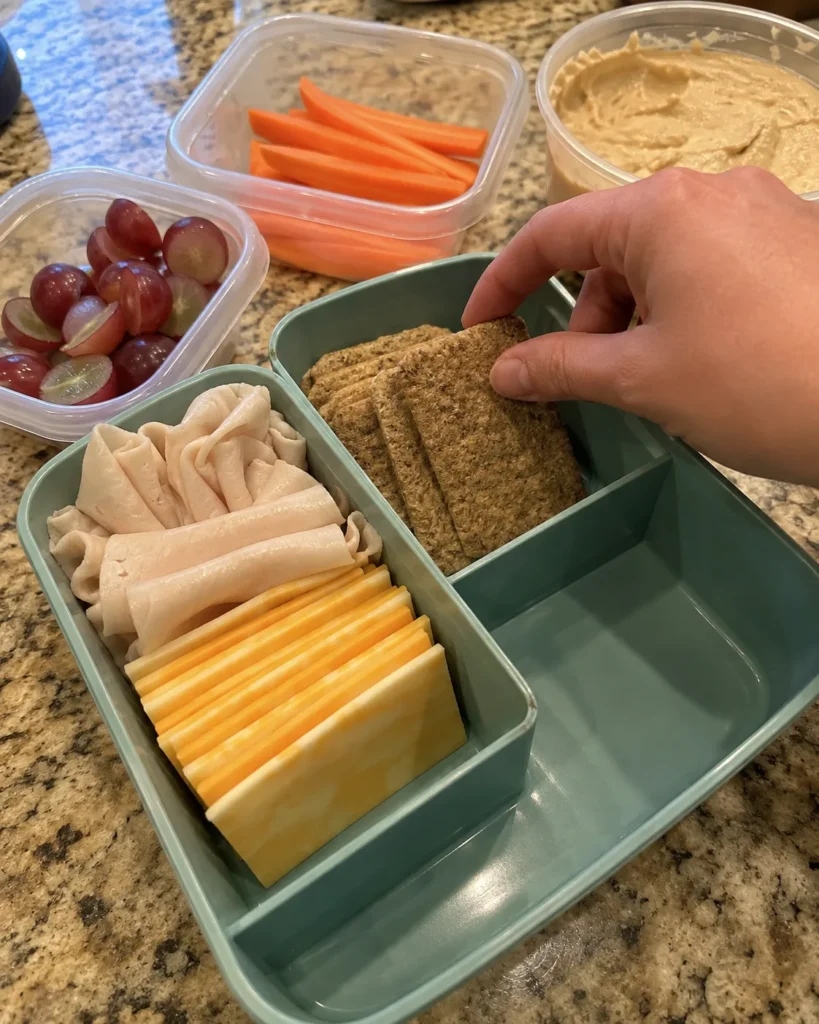
- Prep the produce. Wash the grapes or strawberries and halve any large pieces. Peel and slice the carrots into sticks, or slice the cucumber into rounds.
- Slice the protein and cheese. Cut the turkey or ham and cheese into small squares, or roll them into little bite-sized rolls for easier eating.
- Portion the dip. Spoon the hummus or ranch into small silicone cups, mini containers, or cupcake liners — about 2 tablespoons per box.
- Set up your containers. Use a divided bento box, a snack box with compartments, or simply line a container with cupcake liners to create sections.
- Fill each compartment. Place the protein and cheese in one section, crackers in a separate dry section, fruit in another, and veggies with dip in the last.
- Cover and chill. Snap on the lid and refrigerate right away. The crackers should stay crisp, the produce should look bright and fresh, and everything should feel cold to the touch before it’s packed for the day.
Beginner Tips for Best Results
- Always keep wet ingredients (dip, cut fruit) separated from dry ones (crackers, pretzels) so nothing turns soggy.
- Cut everything into small, bite-sized pieces — it makes the box feel more fun and is easier for little hands to manage.
- Prep a big batch of sliced veggies and fruit on Sunday, then assemble boxes fresh each morning in under 5 minutes.
- Choose a container with a tight-fitting lid so nothing shifts around in a backpack or cooler bag.
- Pack an ice pack any time the box won’t be refrigerated right away.
Common Mistakes to Avoid – DIY Snacky Lunch Box
- Skipping the ice pack: Perishable items like deli meat and cheese need to stay cold, especially on warm days.
- Overfilling compartments: A packed-too-full box is harder to close and more likely to spill in transit.
- Using soft crackers: Delicate crackers crumble fast — a sturdy variety holds up much better in a DIY Snacky Lunch Box.
- Forgetting the produce categories: Sticking to just carbs and protein leaves out the fresh, filling parts that make this lunch balanced.
- Not tasting as you go: A quick taste of the dip or fruit helps you catch anything that’s turned before it’s packed for school.
Easy Variations
- Pizza-style box: Swap in mini pepperoni, mozzarella cubes, and pizza sauce for dipping breadsticks.
- Sweeter box: Add a few dark chocolate chips or a small yogurt-covered pretzel handful to the treat section.
- Protein-packed box: Double the turkey or add a hard-boiled egg for extra staying power before sports practice.
- Holiday box: Use red and green grapes, star-shaped cheese cutouts, and festive napkins for a fun December version.
- Lighter box: Swap crackers for extra veggies and use a low-fat yogurt dip to trim the calories without losing the fun.
What to Serve With a DIY Snacky Lunch Box
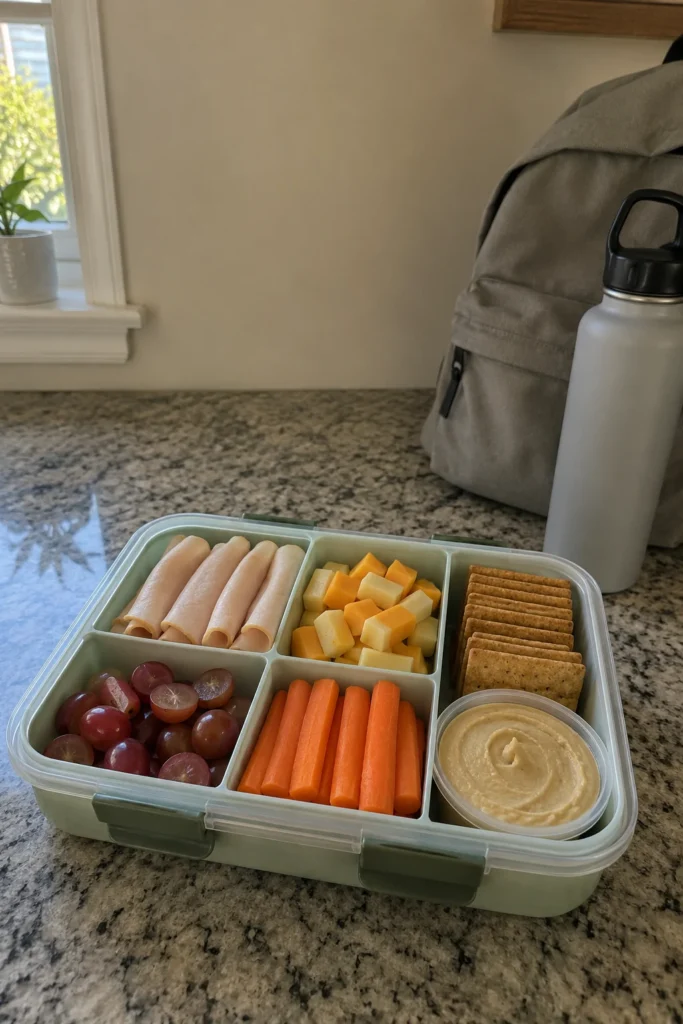
This lunch box is designed to be a complete meal on its own, but a few easy pairings round it out nicely. A small water bottle or milk box keeps things simple for school days.
If you’re packing for a picnic, our Chicken & Cheese Lunchbox Muffins make a great warm addition alongside the cold box. For a fun kid-favorite protein swap, try our Dino Nuggets with Volcano Ketchup instead of deli meat.
Make-Ahead Tips
You can slice all of the produce up to 3 days ahead and store it separately in the fridge. This turns your morning assembly time into just a few minutes.
Deli meat and cheese can be pre-portioned into small bags the night before, which makes packing lunches during a busy week much faster.
How to Store a DIY Snacky Lunch Box
Once assembled, store your DIY Snacky Lunch Box in the refrigerator until it’s time to eat. It will keep well for up to 3 days when the container is sealed tightly.
For food safety, perishable ingredients like deli meat, cheese, and dairy dips should not sit at room temperature for more than 2 hours, per general USDA cold food storage guidance. If the box won’t be refrigerated right away, always pack it with an ice pack in an insulated bag.
Can You Freeze a DIY Snacky Lunch Box?
Freezing isn’t recommended for this recipe. Fresh produce like grapes, cucumbers, and dip don’t thaw well, and the texture turns mushy and watery.
If you want a freezer-friendly lunch option, it’s best to freeze individual components separately, like extra crackers or a batch of muffins, rather than a fully assembled box.
How to Reheat
There’s nothing to reheat here — this is a cold, no-cook lunch by design! Simply pull the box from the fridge about 10–15 minutes before eating if you prefer the cheese and fruit slightly less cold.
Nutrition Notes
A DIY Snacky Lunch Box built with protein, whole grain crackers, fruit, and veggies offers a nice balance of energy, fiber, and calcium. For general guidance on building balanced snacks and meals, MyPlate.gov is a helpful reference for portioning food groups.
Exact nutrition will vary quite a bit depending on which ingredients and portions you choose, so this recipe isn’t intended as a precise nutritional prescription. If you have specific dietary needs, a registered dietitian can help you fine-tune the categories.
Frequently Asked Questions – DIY Snacky Lunch Box
What is a DIY Snacky Lunch Box?
A DIY Snacky Lunch Box is a homemade, no-cook lunch built from four simple categories — protein, crunchy carb, fruit, and veggie with dip — packed into a divided container instead of bought pre-made.
How long does this lunch box last in the fridge?
When sealed tightly and refrigerated, it stays fresh for up to 3 days. Always check that deli meat and dairy items are still within their own use-by dates.
Can I make a DIY Snacky Lunch Box ahead of time?
Yes! You can prep and slice the produce up to 3 days ahead, then assemble the full box in just a few minutes each morning.
Is this recipe healthy?
It can be, since you control every ingredient. Building it around lean protein, whole grain crackers, fresh fruit, and veggies keeps it balanced without any added effort.
What container works best for this recipe?
A bento-style box with 3–5 compartments works best. If you don’t have one, cupcake liners or small containers inside a larger box create the same separation.
Can I pack a DIY Snacky Lunch Box for adults too?
Absolutely — this formula works just as well for adult lunches. Just swap in ingredients like olives, hard cheese, or dark chocolate for a more grown-up flavor profile.
Do I need to keep it cold all day?
Yes, since it contains perishable items like deli meat and cheese. Always pack it with an ice pack if it won’t be refrigerated until lunchtime.
Final Thoughts – DIY Snacky Lunch Box
Once you try this DIY Snacky Lunch Box formula, you probably won’t go back to store-bought lunch kits. It’s faster, more affordable, and lets everyone in the family build a lunch they actually want to eat. Give it a try this week and see how quickly it becomes part of your regular lunch routine.
Print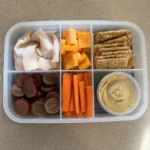
DIY Snacky Lunch Box
- Total Time: 15 minutes
- Yield: 4 lunch boxes 1x
Description
A quick, no-cook DIY Snacky Lunch Box built from protein, crunchy crackers, fresh fruit, and veggies with dip — a healthier, budget-friendly twist on store-bought lunch kits that’s ready in 15 minutes.
Ingredients
8 oz deli turkey or ham
8 slices cheese (or 4 cheese sticks)
24 whole grain crackers
2 cups grapes or strawberries, halved if large
2 medium carrots (or 1 cucumber), sliced into sticks or rounds
½ cup hummus, ranch, or yogurt dip
Optional: pretzels, dark chocolate squares, or a granola bar
Instructions
1. Wash and prep all produce; slice carrots or cucumber and halve any large fruit.
2. Slice the protein and cheese into small squares or roll-ups.
3. Portion the dip into small containers or silicone cups.
4. Set up a divided container or use cupcake liners to create sections.
5. Fill each section: protein and cheese, crackers, fruit, and veggies with dip.
6. Cover tightly and refrigerate until ready to eat.
Notes
Keep wet and dry ingredients in separate compartments to prevent soggy crackers.
Pack with an ice pack if not refrigerated within 2 hours of assembly.
Nutrition is an estimate based on the base combo listed and will vary depending on ingredients chosen.
- Prep Time: 15 minutes
- Cook Time: 0 minutes
- Category: Lunch & Snacks
- Method: No-Cook Assembly
- Cuisine: American
Nutrition
- Serving Size: 1 lunch box
- Calories: 420 kcal
- Sugar: 11g
- Sodium: 740mg
- Fat: 22g
- Saturated Fat: 9g
- Unsaturated Fat: 11g
- Trans Fat: 0g
- Carbohydrates: 34g
- Fiber: 4g
- Protein: 23g
- Cholesterol: 65mg
Print and Save This DIY Snacky Lunch Box
If this recipe fits your weeknight routine, print it or save it so you can come back to it the next time you need an easy homemade meal. Once you’ve built your own DIY Snacky Lunch Box a couple of times, you’ll be able to whip one up from memory in minutes.