
If you need a snack that comes together in minutes and still looks like you tried, these Cheese & Veggie Roll-Ups are exactly the recipe to keep on hand. A simple herbed cream cheese spread gets rolled up in a soft tortilla with crisp, colorful vegetables and a little shredded cheese, then chilled and sliced into pretty pinwheels. No oven, no fuss, no complicated technique.
They’re the kind of recipe that works for almost any occasion. Pack them in a lunchbox, set them out for game day, or slice a batch for an after-school snack the kids can grab themselves. Because everything is mixed cold and rolled by hand, this is a wonderfully forgiving recipe for beginner cooks.
Save this one for busy days when you need something simple, cozy, and family-friendly.
Quick Recipe Snapshot
- Prep time: 15 minutes
- Chill time: 1–2 hours
- Total time: About 1 hour 15 minutes to 2 hours 15 minutes
- Servings: 8 (about 32–40 pinwheels)
- Difficulty level: Beginner-friendly
- Best for: Parties, lunchboxes, after-school snacks, potlucks
- Main method: No-bake, chilled
- Flavor profile: Creamy, herby, and fresh with a little crunch
Table of Contents
Why You’ll Love This Cheese & Veggie Roll-Ups
- No baking required. Just mix, spread, roll, and chill.
- Beginner-friendly. There’s no tricky technique to master, just simple rolling.
- Great for make-ahead planning. Prep the night before and slice right before serving.
- Kid-approved. Mild, creamy flavor that even picky eaters tend to enjoy.
- Endlessly customizable. Swap in whatever vegetables or cheese you already have.
- Portable and mess-free. Perfect for lunchboxes, road trips, and potlucks.
What Makes This Cheese & Veggie Roll-Ups Work
This recipe comes down to two things: a well-seasoned, spreadable cream cheese base and vegetables chopped small enough to roll neatly. A touch of mayonnaise or sour cream keeps the cream cheese soft even after chilling, so it slices cleanly instead of cracking.
Layering the filling — spread first, veggies and cheese on top — instead of mixing it all into one bowl also helps. It seals the tortilla’s edges better, so the pinwheels hold their shape when sliced.
Ingredients You’ll Need
- Cream cheese (8 ounces, softened): This is the base that holds everything together. Let it sit at room temperature for about 30 minutes so it blends smoothly.
- Mayonnaise or sour cream (2–3 tablespoons): Lightens the cream cheese so it spreads easily and stays soft after chilling.
- Garlic powder, onion powder, and dried dill (about ½ teaspoon each): A simple herb blend that gives the filling a fresh, ranch-style flavor without needing a store-bought packet.
- Shredded cheddar cheese (1 cup): Adds savory depth and helps the filling hold together. Colby jack, mozzarella, or Monterey Jack all work well too.
- Mixed vegetables, finely diced (about 2 cups): Bell pepper, carrot, broccoli, and green onion are a great starting combination for color and crunch.
- Flour tortillas (5 medium, 8–10 inch): Soft tortillas roll tightly without cracking. Whole wheat or spinach tortillas work fine as a swap.
Ingredient Notes and Easy Swaps
Chop the vegetables as small as you can. Larger pieces create air pockets that make the roll-ups fall apart when sliced.
Skip juicy vegetables like fresh tomatoes or cucumber with the seeds left in — the extra moisture can make the tortilla soggy. If you love the flavor of cucumber, seed it first and pat it dry.
For a shortcut, swap the homemade herb blend for half a packet of ranch seasoning mix. Flavored cream cheese, like chive-and-onion or garlic-and-herb, also works well in place of the plain cream cheese and seasonings.
Always wash fresh produce thoroughly under running water before chopping, since these vegetables go into the roll-ups raw.
How to Make Cheese & Veggie Roll-Ups
- Mix the filling. In a medium bowl, beat the softened cream cheese with the mayonnaise or sour cream until smooth. Stir in the garlic powder, onion powder, and dill until fully combined.
- Fold in the extras. Add the shredded cheese and finely diced vegetables to the cream cheese mixture. Fold gently until everything is evenly distributed.
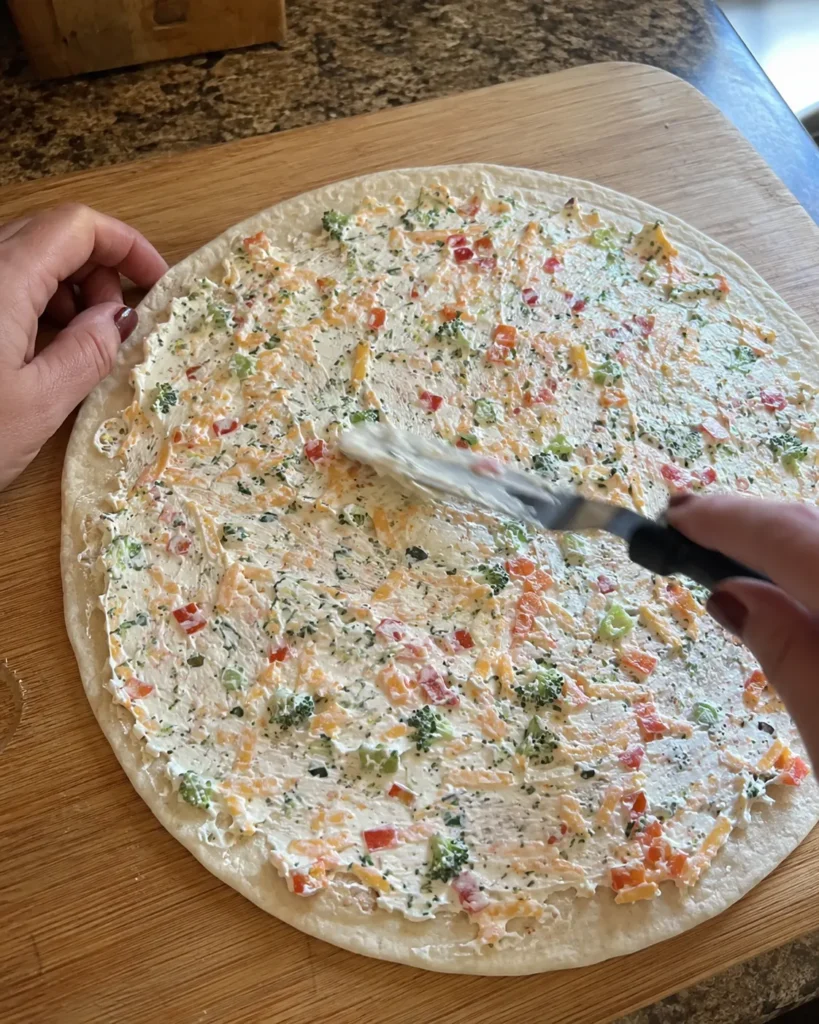
- Spread the tortilla. Lay a tortilla flat and spread about a third of a cup of the filling evenly over the surface, going all the way to the edges.
- Roll it tightly. Starting from one edge, roll the tortilla into a tight log. A snug roll is what keeps the pinwheels from falling apart later.
- Wrap and repeat. Wrap each rolled tortilla individually in plastic wrap. Repeat with the remaining tortillas and filling.
- Chill. Refrigerate the wrapped rolls for at least 1 hour, or up to overnight, so they firm up enough to slice cleanly.
- Slice and serve. Unwrap each roll, trim the uneven ends, and slice into pinwheels about ¾ inch thick. Look for a tight spiral with no gaps — that’s the sign of a well-rolled Cheese & Veggie Roll-Ups.
Beginner Tips for Best Results
Let the cream cheese soften fully before mixing. Cold, stiff cream cheese is hard to spread and tears the tortilla.
Use a butter knife or small offset spatula to spread the filling evenly, all the way to the edges of the tortilla. Bare edges mean the roll-up can unravel.
Chill the rolls longer than you think you need to. A full hour is the minimum, but two hours (or overnight) makes for the cleanest slices.
Use a sharp, thin knife for slicing, and wipe it clean between cuts if the filling starts to smear.
Common Mistakes to Avoid – Cheese & Veggie Roll-Ups
Overfilling the tortilla. Too much filling pushes out the sides when rolled. Stick to a thin, even layer.
Skipping the chill time. Slicing right away almost always causes squishing. Patience pays off here.
Chopping vegetables too large. Big chunks create gaps and messy slices. Dice everything small and uniform.
Using a dull knife. A dull blade drags through the roll instead of cutting cleanly.
Easy Variations
- Spicier version: Add a pinch of cayenne or a few dashes of hot sauce to the cream cheese mixture, or fold in diced pickled jalapeños.
- Southwest-style: Swap the herbs for taco seasoning and add black beans and corn to the vegetable mix.
- Holiday version: Use red bell pepper and green scallions for a festive color combination, perfect for a holiday appetizer tray.
- Kid-friendly version: Stick to mild vegetables like shredded carrot and cucumber (seeded), and skip anything spicy.
- Lighter version: Use light cream cheese and plain Greek yogurt in place of the mayonnaise.
If you love the roll-up format, you might also enjoy these Keto Crispy Reuben Roll-Ups for a heartier, savory twist.
What to Serve With Cheese & Veggie Roll-Ups

These roll-ups shine on a party platter alongside other easy, no-fuss finger foods. A batch of Cranberry Pecan Cheese Ball and some crackers rounds out a simple cheese and appetizer spread.
For game day or a bigger crowd, pair them with a warm dip like Firecracker Dip or set out a tray of Air Fryer Tortilla Kebab Skewers for more tortilla-based bites.
For a lunchbox pairing, tuck a few pinwheels alongside Chicken Cheese Lunchbox Muffins for a balanced, kid-friendly meal.
Make-Ahead Tips
This recipe is genuinely easier the day ahead. Mix the filling and assemble the rolls, wrap each one tightly in plastic wrap, and refrigerate overnight. Slice just before serving for the cleanest presentation and freshest texture.
If you’re prepping for a lunchbox, consider slicing individual portions of Cheese & Veggie Roll-Ups the night before and storing them in a small airtight container so mornings stay simple.
How to Store Cheese & Veggie Roll-Ups
Store leftover roll-ups tightly wrapped or in an airtight container in the refrigerator for up to 3–4 days. Because the filling contains dairy and fresh vegetables, it’s best to keep them refrigerated and avoid leaving them at room temperature for more than two hours, especially at parties or picnics.
For the best texture, slice only what you plan to serve and keep the rest whole and wrapped until you’re ready for more.
Can You Freeze Cheese & Veggie Roll-Ups?
Freezing isn’t recommended for this recipe. The fresh vegetables and cream cheese filling release moisture as they thaw, which leaves the tortilla soggy and the texture watery. For longer storage guidance on dairy-based leftovers, the fridge is the safer choice here — this one is best enjoyed within a few days of making it.
How to Reheat
These roll-ups are meant to be served cold, so no reheating is necessary. Simply remove them from the refrigerator, slice if you haven’t already, and serve straight away.
Nutrition Notes
Cheese & Veggie Roll-Ups offer a nice mix of protein and vegetables from the cheese and fresh produce, plus carbohydrates from the tortilla. Exact nutrition varies with the tortillas, cheese, and vegetables you choose, so treat any numbers as a general estimate.
Frequently Asked Questions – Cheese & Veggie Roll-Ups
Can I make Cheese & Veggie Roll-Ups the night before?
Yes. In fact, they slice more cleanly after chilling overnight, which makes this a great make-ahead option for parties.
Why did my roll-ups fall apart when I sliced them?
Usually from overfilling, large vegetable pieces, or not chilling long enough. Chill at least an hour and use a sharp knife.
Can I use a different type of cheese?
Yes. Colby jack, mozzarella, or Monterey Jack all work well in place of cheddar.
Are Cheese & Veggie Roll-Ups good for meal prep?
They’re best assembled ahead and sliced closer to serving, since pre-sliced pieces dry out a bit faster in the fridge.
Can I use whole wheat tortillas?
Absolutely. Whole wheat, spinach, or flavored tortillas all work well in this recipe.
Do I have to use mayonnaise?
No. Sour cream or plain Greek yogurt both work as substitutes and give a similar creamy texture.
How many roll-ups does this recipe make?
Using 5 medium tortillas, this recipe makes about 32 to 40 pinwheels, depending on how thick you slice them.
Final Thoughts – Cheese & Veggie Roll-Ups
Cheese & Veggie Roll-Ups are proof that a great snack doesn’t need to be complicated. A few pantry staples, some fresh vegetables, and a little chill time are all it takes to have something worth sharing. Give this one a try the next time you need an easy, crowd-pleasing bite.
Print
Cheese & Veggie Roll-Ups
- Total Time: 75 minutes
- Yield: 8 servings (about 32–40 pinwheels) 1x
- Diet: Vegetarian
Description
Creamy, herby cream cheese rolled up with crisp, colorful vegetables and shredded cheddar in soft flour tortillas, chilled and sliced into easy party-ready pinwheels.
Ingredients
8 oz cream cheese, softened
2–3 tbsp mayonnaise or sour cream
1/2 tsp garlic powder
1/2 tsp onion powder
1/2 tsp dried dill
1 cup shredded cheddar cheese
2 cups mixed vegetables, finely diced (bell pepper, carrot, broccoli, green onion)
5 medium (8-10 inch) flour tortillas
Instructions
1. Beat softened cream cheese with mayonnaise or sour cream until smooth; stir in garlic powder, onion powder, and dill.
2. Fold in shredded cheese and diced vegetables until evenly combined.
3. Spread about 1/3 cup of filling evenly over each tortilla, edge to edge.
4. Roll each tortilla tightly into a log.
5. Wrap individually in plastic wrap; refrigerate at least 1 hour, up to overnight.
6. Unwrap, trim uneven ends, and slice into 3/4-inch pinwheels. Serve cold.
Notes
Do not freeze – fresh vegetables release moisture and make the tortilla soggy.
Store in the fridge up to 3-4 days.
Chill for at least 1 hour before slicing for the cleanest pinwheels.
- Prep Time: 15 minutes
- Cook Time: 60 minutes
- Category: Appetizer, Snack
- Method: No-Bake
- Cuisine: American
Nutrition
- Serving Size: 4 pieces
- Calories: 100 kcal
- Sugar: 1g
- Sodium: 190mg
- Fat: 8g
- Saturated Fat: 3g
- Unsaturated Fat: 4g
- Trans Fat: 0g
- Carbohydrates: 4g
- Fiber: 1g
- Protein: 4g
- Cholesterol: 15mg
Print and Save This Cheese & Veggie Roll-Ups
If this recipe fits your weeknight routine, print it or save it so you can come back to it the next time you need an easy homemade snack or appetizer.