A Crusty Beginning: My First Graham Cracker Disaster
Let me tell you about the first time I ever made a graham cracker crust.
I was 27, overconfident, and armed with a pie pan, a food processor I didn’t know how to use, and zero understanding of how butter behaves when angry.
I crushed the crackers like a boss, eyeballed the butter (never do that), and proudly patted the mixture into the pan like I was auditioning for The Great British Bake Off.
It looked… fine. Until I took it out of the oven.
What came out was a bubbling, lava-like puddle of butter with islands of graham crumbs clinging to the edges like survivors. My “crust” had become a buttery slip ’n slide. I served it anyway, naturally. Told my guests it was a “deconstructed cheesecake experience.” They politely nodded. And then we just ate the filling with spoons.
Moral of the story? A great graham cracker crust is so simple — but also surprisingly easy to mess up if you don’t know the secrets. Lucky for you, I’ve made all the mistakes so you don’t have to.
Let’s break it down — crumb by crumb.
Table of Contents
Table of Contents
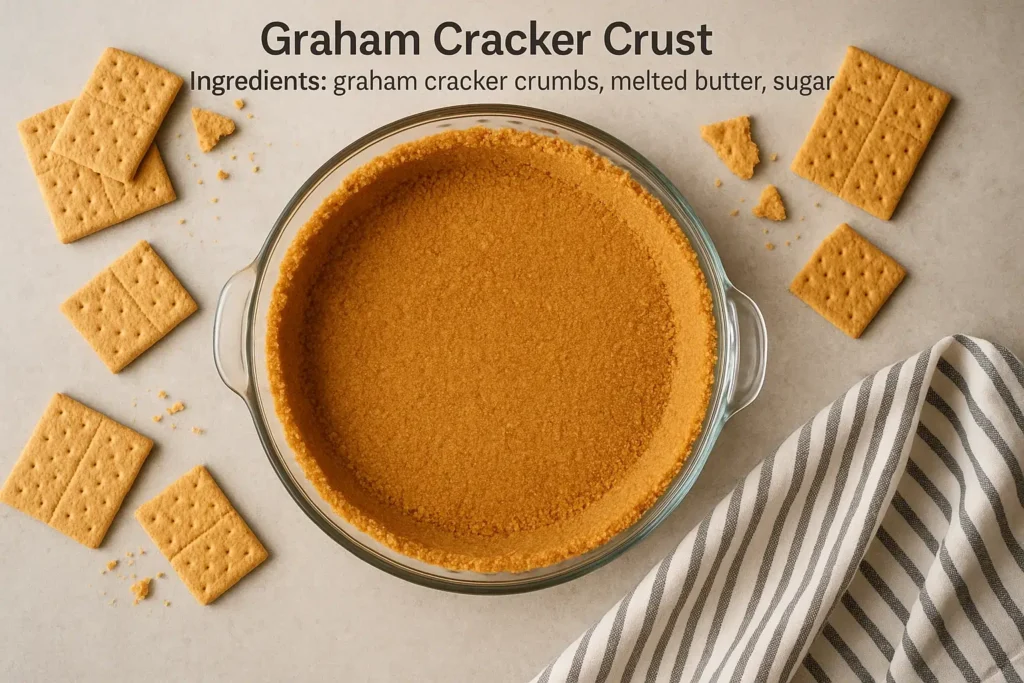
What Is a Graham Cracker Crust?
If you’ve ever had a cheesecake, key lime pie, or a dreamy no-bake dessert, chances are… you’ve already fallen in love with a graham cracker crust — maybe without even knowing it.
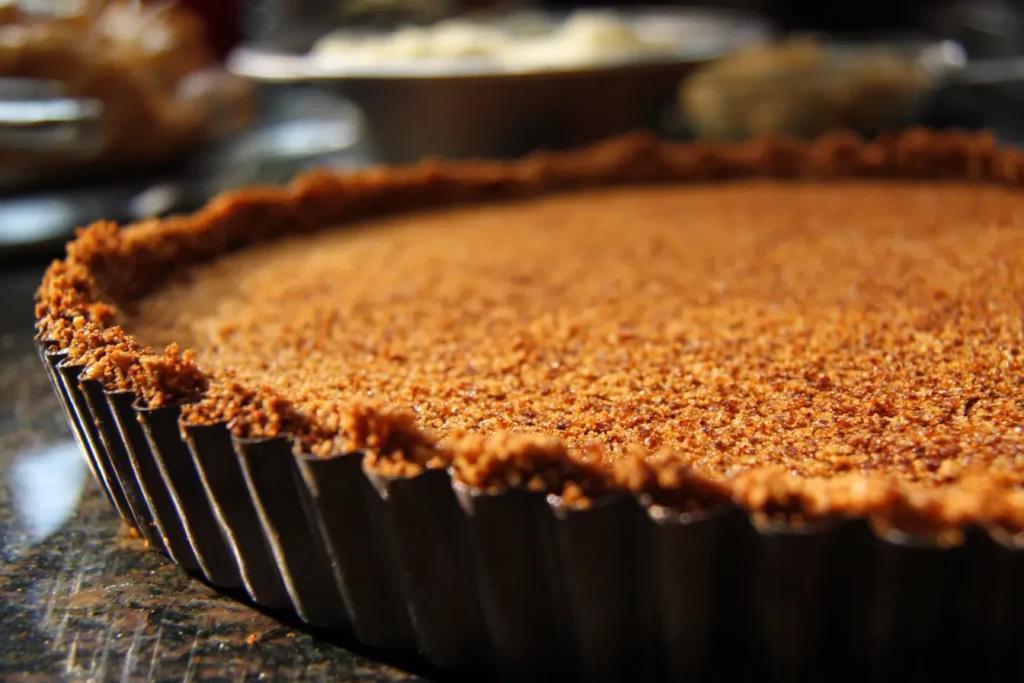
A graham cracker crust is a buttery pie crust alternative made from — you guessed it — crushed graham crackers, melted butter, and a touch of sugar. It’s flaky but firm, sweet but not overpowering, and brings just the right crunch to creamy desserts.
Why Is It So Popular?
Because it’s easy, fast, and doesn’t require the finesse of traditional pastry dough. For many beginner bakers (🙋♀️), learning how to make graham cracker crust is like unlocking the gateway to endless dessert success.
Plus, it’s:
- No-fuss (no chilling, rolling, or fancy equipment)
- Super adaptable (bake or no-bake, gluten-free or vegan)
- Deliciously nostalgic — it tastes like childhood and summer picnics
You’ll find homemade graham cracker crusts used in:
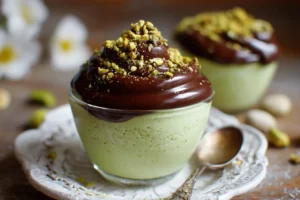
- Classic cheesecakes like my Southern Orange Pineapple Cheesecake
- No-bake pies like this Strawberry Banana Pudding
- Easy summer desserts like No-Bake Coconut Balls
Whether you’re making a graham cracker crust for a cheesecake, layering it under lemon bars, or pressing it into a springform pan for your next potluck, this crust is your new baking BFF.
Ingredients You’ll Need (And Why They Matter)
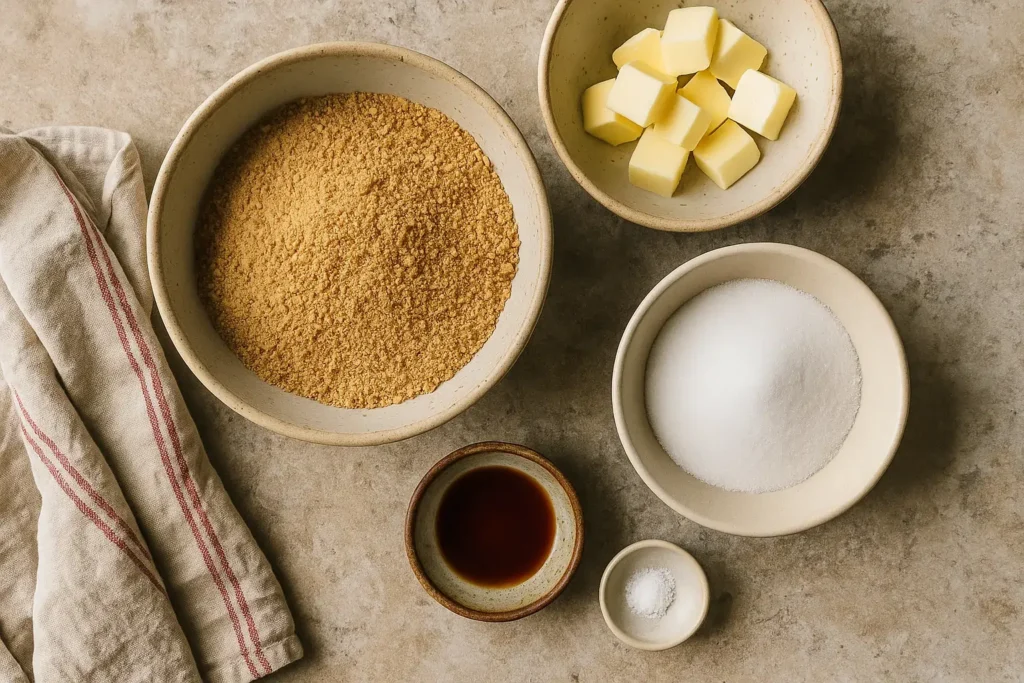
It’s just three core ingredients — but don’t be fooled. The right balance of butter, sugar, and crumbs makes all the difference between a crust that snaps and one that sags.
Graham Crackers (1 ½ cups, crushed)
The soul of your graham cracker crust.
No grahams? Swap with:
- Digestive biscuits
- Biscoff cookies
- Gingersnaps or vanilla wafers
Want a gluten-free graham cracker crust? Sub in GF grahams or almond flour.
Butter (6 tbsp, melted)
This is your binder and flavor booster.
Use salted for extra taste or go dairy-free with coconut oil or vegan butter.
Sugar (¼ cup)
White sugar = classic.
Brown sugar = deeper flavor.
No-bake? Try honey or maple syrup instead (but skip these for baked crusts).
Optional Flavor Boosters
- ½ tsp vanilla
- A pinch of cinnamon
- Zest of lemon or orange
- Toasted coconut (yum)
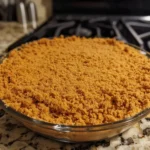
Graham Cracker Crust
- Total Time: 20 minutes
- Yield: 1 crust (serves 8) 1x
- Diet: Vegetarian
Description
This buttery, crunchy graham cracker crust is your go-to base for cheesecakes, pies, and no-bake desserts. It’s quick to make with just 3 ingredients and works beautifully baked or chilled — perfect for beginners and pros alike!
Ingredients
-
1 ½ cups graham cracker crumbs (about 10–12 full crackers)
-
⅓ cup unsalted butter, melted
-
3 tablespoons granulated sugar
Optional:
-
¼ teaspoon cinnamon
-
1 teaspoon vanilla extract
Instructions
-
Prep your pan: Lightly grease a 9-inch pie plate or springform pan.
-
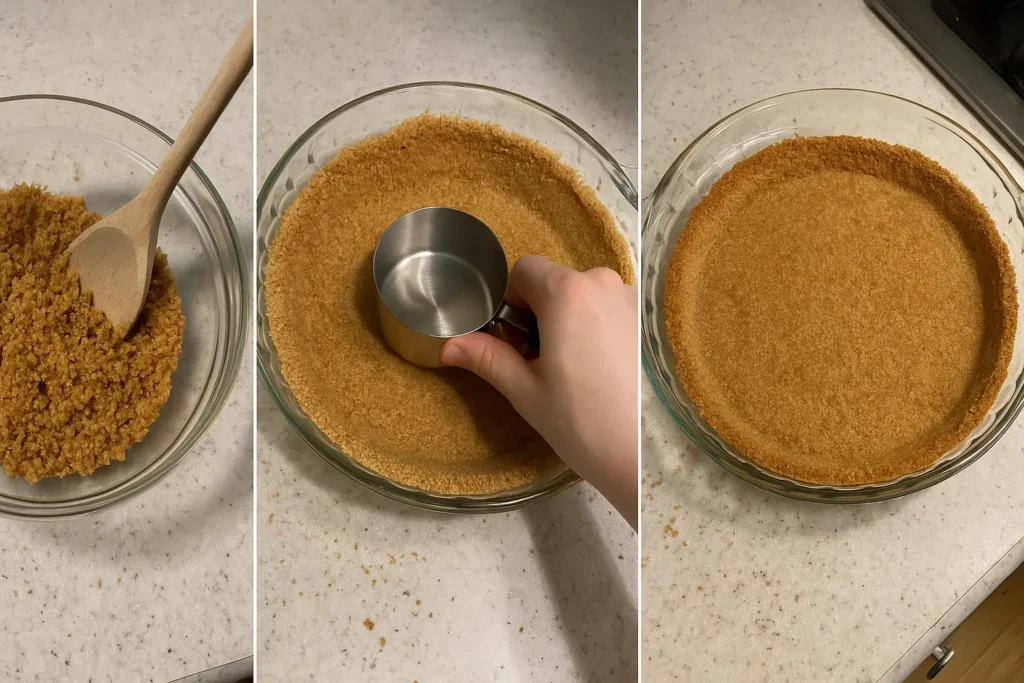
Crush the crackers: Use a food processor or a zip-top bag + rolling pin to make fine crumbs.
-
Mix it up: Combine graham cracker crumbs, sugar, and melted butter in a bowl. Stir until evenly coated.
-
Press into pan: Pour mixture into the pan. Use a measuring cup to press crumbs evenly into the base and up the sides.
-
Chill or bake:
-
No-bake: Chill crust for 2+ hours (or overnight) before filling.
-
Baked: Preheat oven to 350°F (175°C). Bake for 8–10 minutes, then cool completely.
-
Notes
-
Make it gluten-free: Use certified gluten-free graham crackers.
-
Vegan option: Swap butter for melted coconut oil or vegan butter.
-
Flavor boost: Add citrus zest or a pinch of nutmeg to customize.
-
Great for cheesecakes, key lime pie, banana cream pie, or freezer bars.
-
Crust can be made 3 days ahead or frozen for 3 months.
- Prep Time: 10 minutes
- Cook Time: 10 minutes (if baked)
- Category: Dessert
- Method: No-Bake
- Cuisine: American
Nutrition
- Serving Size: 1 slice
- Calories: ~185 kcal
- Sugar: 7g
- Sodium: 115mg
- Fat: 11g
- Saturated Fat: 6g
- Unsaturated Fat: 4g
- Trans Fat: 0g
- Carbohydrates: 19g
- Fiber: 1g
- Protein: 1.5g
- Cholesterol: 20mg
Step-by-Step Graham Cracker Crust Recipe (With Tips)
This homemade graham cracker crust recipe is fast, beginner-friendly, and works for both baked and no-bake desserts. Whether you’re making a graham cracker crust for cheesecake, key lime pie, or parfait cups, this base delivers every time.
Here’s how to make a no-fail graham cracker crust that won’t fall apart.
Ingredients
- 1 ½ cups crushed graham crackers (about 10–12 full sheets)
- 6 tablespoons melted butter (salted or unsalted)
- ¼ cup sugar (granulated or brown)
- Optional: ½ tsp vanilla extract, 1 tsp cinnamon, citrus zest
Equipment
- 9-inch pie pan or springform pan
- Mixing bowl
- Measuring cups
- Food processor or rolling pin + zip-top bag
- Spoon or flat-bottomed glass (to press the crust)
Directions
1. Make Graham Cracker Crumbs
Use a food processor or smash crackers in a bag. You want fine, sand-like texture — no chunks! This is the foundation of a firm graham cracker crust.
2. Mix Your Crust Base
In a bowl, combine graham cracker crumbs, melted butter, and sugar. Mix until it looks like wet sand.
✅ Keyword Tip: This forms the classic sugar and butter pie crust — buttery, crumbly, and ready to bake (or chill).
3. Press the Mixture into the Pan
Evenly spread the mixture into your pie pan or springform pan. Use the back of a spoon or a glass to press it firmly but gently. Pressing too hard? Crust will crack. Too soft? It’ll crumble.
4. Bake or Chill
- For baked crusts: Bake at 350°F (175°C) for 8–10 minutes, until golden. Cool before filling.
- For no-bake: Chill the crust in the fridge for at least 2 hours.
This is how you make a graham cracker crust that doesn’t fall apart.
Nutrition Info (Per Serving – Based on 8 Slices)
Making a graham cracker crust at home doesn’t just taste better — it can be lighter, cleaner, and more customizable than pre-packaged options.
A standard homemade graham cracker crust made with graham crackers, butter, and sugar (no add-ins) yields approximately:
| Nutrient | Approx. Amount |
|---|---|
| Calories | ~150 kcal |
| Fat | ~9g |
| Carbohydrates | ~17g |
| Sugar | ~8g |
| Protein | ~1g |
| Fiber | ~0.5g |
These values are based on 1 slice of an 8-slice pie. You can verify these estimates using tools like the USDA’s FoodData Central, which provides nutrition breakdowns for ingredients.
Ingredient Impact
- Butter contributes most of the fat and calories. Want to swap it out? Understand the differences with this guide to healthy fats from Harvard, which compares butter, coconut oil, and vegan alternatives.
- Sugar adds sweetness and crispness. Curious how it affects your daily intake? The Mayo Clinic’s nutrition label guide helps explain what’s too much.
If you’re customizing your crust with:
- Toasted coconut, expect more fat and fiber
- Maple syrup or honey, you’ll increase sugars and carbs
- Nuts (like almonds or pecans), you’ll add plant-based fats and a protein boost
Crust Fails? Avoid These Mistakes + Quick Fixes
Even the easiest homemade graham cracker crust can turn into a crumbly disaster if you’re not careful. Whether you’re baking for a party or prepping a no-bake cheesecake, these common mistakes can sabotage your crust — but don’t worry, we’ve got fast fixes.
Top Mistakes When Making a Graham Cracker Crust
| Mistake | What Goes Wrong | Quick Fix |
|---|---|---|
| Not using enough butter | Crust falls apart when slicing | Stick to the 6 tbsp rule — use melted butter for a strong bind |
| Crushing grahams unevenly | Lumpy crust, cracks in pan | Use a food processor or finely crush with a rolling pin and bag |
| Pressing too hard or too soft | Crust cracks or crumbles | Press firmly, not forcefully — use the back of a glass |
| Overbaking the crust | Crust becomes too hard or burnt | Bake just 8–10 minutes at 350°F, and watch closely at minute 9 |
| Skipping the chill for no-bake | Crust won’t hold together | Always chill at least 2 hours before filling |
| Using warm filling | Crust melts or softens too much | Let fillings cool completely before pouring in |
Bonus Troubleshooting: What If It Already Happened?
Overbaked & Rock-Hard?
Use a grater to shave off the top layer. Serve with a creamy filling (like key lime or mousse) to balance the crunch.
Crust Falling Apart After Baking?
Let it cool completely — a hot crust is fragile. If it’s still loose, crumble it and layer it into mini jars or a parfait!
Pool of Butter at the Bottom?
You likely added too much butter or didn’t mix evenly. Absorb excess with a paper towel — and next time, mix until it resembles wet sand.
Crust Stuck to the Pan?
Lightly grease your pan before pressing in the crumbs. You can also line the base with parchment for perfect release.
Crust Variations & Dietary Swaps (Quick & Customizable)
Whether you’re going gluten-free, vegan, or just want to add a little flair, this graham cracker crust is easy to customize without losing its buttery magic.
Gluten-Free Graham Cracker Crust
Swap regular grahams for a certified gluten-free brand like Pamela’s. Everything else — butter, sugar, and technique — stays the same.
Vegan / Dairy-Free Option
Use melted coconut oil or vegan butter in place of butter. Swap maple syrup for sugar in no-bake versions.
Nut-Based Alternative
For a grain-free crust, use crushed almonds, pecans, or walnuts with maple syrup. Great for raw and paleo-style desserts.
Fun Flavor Twists
- Chocolate: Add cocoa powder
- Cinnamon-sugar: Add brown sugar + cinnamon
- Coconut: Add toasted shredded coconut
- Citrus: Use zest for a fresh punch
Quick Tip: All variations can be baked or chilled — just keep ratios balanced.
Crust for Every Dessert Type (What Goes Best with Graham Cracker Crust)
A good graham cracker crust doesn’t just stop at cheesecake. This buttery, crumbly base works with dozens of desserts — especially the chilled, creamy kind.
Here’s how to pair it perfectly:
Cheesecake (Baked or No-Bake)
The graham cracker crust for cheesecake is a classic — especially for New York–style or no-bake versions.
Use a springform pan, and press crumbs up the sides for full structure.
📌 Tip: Bake the crust for 8 minutes for extra firmness (even for no-bake cheesecakes).
No-Bake Pies & Icebox Desserts
The no-bake graham cracker crust shines in icebox pies, creamy banana puddings, and layered mousse treats.
Just chill for at least 2 hours before filling — or overnight for best hold.
Key Lime & Citrus Tarts
Crisp, zesty fillings like key lime or lemon bars contrast beautifully with a buttery graham base.
Add a little lime zest to the crust itself for a next-level pairing.
Mini Pies, Jars & Dessert Bars
Mini desserts deserve a sturdy foundation too. This easy graham cracker crust presses beautifully into muffin tins, ramekins, and jars.
Storage, Make-Ahead & Freezing Tips
One of the best perks of using a graham cracker crust? It’s ultra-forgiving and make-ahead friendly — whether baked or not.
How to Store a Graham Cracker Crust
- Unbaked: Wrap tightly in plastic wrap + foil. Store in the fridge for up to 3 days.
- Baked: Cool completely, then wrap and refrigerate up to 5 days — ideal for a make-ahead pie crust.
- With Filling: Follow your dessert’s instructions, but crust holds best up to 3 days once filled.
Can You Freeze Graham Cracker Crust?
Absolutely. Here’s how to freeze it:
- Press the crust into your pie plate or tart pan
- Wrap it well in foil or a freezer-safe bag
- Label and date
- Freeze for up to 3 months
When ready to use, thaw in the fridge overnight — and for no-bake crusts, chill again before filling to ensure structure.
Time-Saving Tips
- Batch it: Make two crusts at once and freeze one for later.
- Holiday hack: Prep crusts days in advance and just add filling when ready.
- Mini pies or jars? Freeze crusts pre-portioned in muffin tins or ramekins.
Graham Cracker Crust FAQs (Quick & Helpful)
Why is my graham cracker crust falling apart?
If your graham cracker crust is crumbly, it likely needs more butter to bind the crumbs or more pressing to compact it properly. For no-bake versions, be sure to chill the crust for at least 2 hours before filling to help it hold together.
Do you need to bake a graham cracker crust?
Not always! A no-bake graham cracker crust is perfect for chilled desserts like icebox pies or cheesecakes. However, baking the crust for just 8–10 minutes helps set the shape and intensifies flavor, especially for hot or custard-based fillings.
Can I freeze a graham cracker crust?
Yes, absolutely. You can freeze a homemade graham cracker crust (baked or unbaked) in the pan. Just wrap it tightly in plastic and foil, then freeze for up to 3 months. Thaw overnight in the fridge before using.
How many graham crackers do I need for 1½ cups of crumbs?
About 10–12 full graham cracker sheets will yield 1½ cups of fine crumbs — the amount needed for one standard 9-inch graham cracker crust.
What desserts use graham cracker crust?
A graham cracker crust is ideal for cheesecakes, key lime pies, banana cream pies, icebox desserts, no-bake bars, and even mini dessert jars. It’s versatile and works with both baked and chilled recipes.
Final Thought
A graham cracker crust may be simple, but it’s the start of something delicious. Whether you’re baking a rich cheesecake or whipping up a no-bake treat, this easy, homemade crust has your back (and your pie plate).
Now go make some dessert magic — and don’t forget to save a slice for yourself.
for more recipes follow me in Facebook, Pinterest and medium.