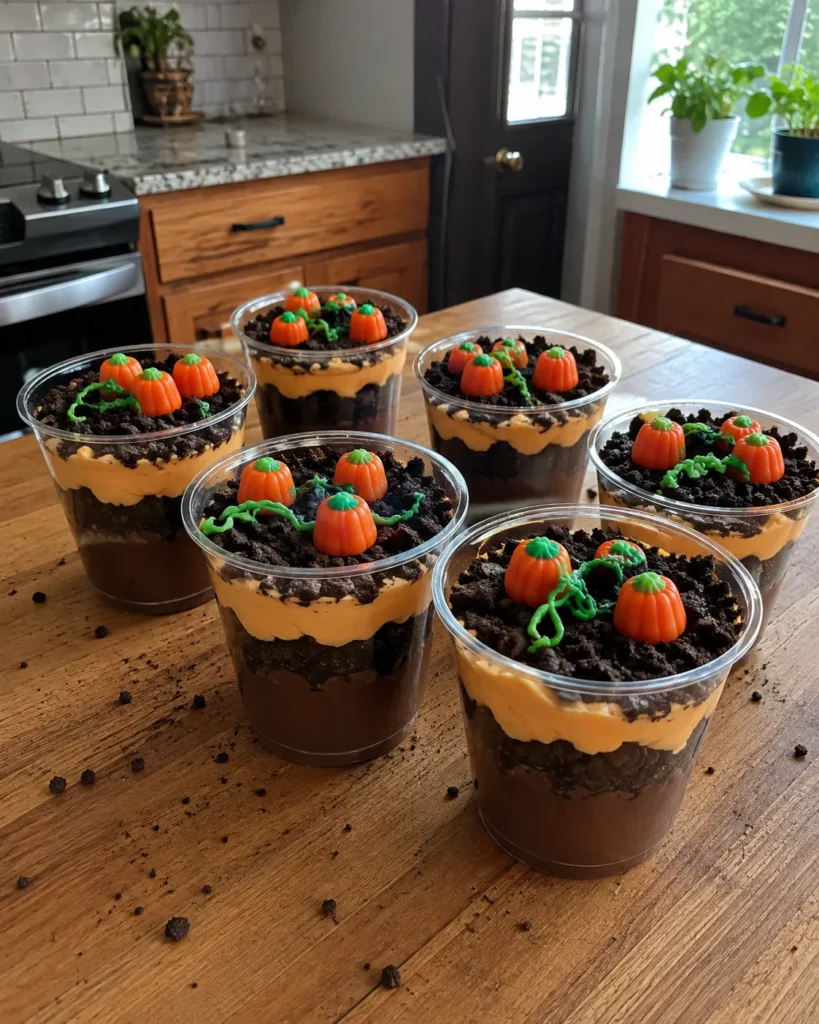
If you’re looking for a fall dessert that’s equal parts adorable and easy, these Pumpkin Patch Dirt Cups are about to become your new go-to. Layers of rich chocolate pudding, crushed Oreo “dirt,” and a hint of orange pudding come together in individual cups, topped with candy pumpkins that make the whole thing look like a tiny harvest patch.
This recipe has zero baking involved, takes about 15 minutes of hands-on time, and uses ingredients most of us already have sitting in the pantry. Whether you’re hosting a Halloween party, need a fun Thanksgiving dessert, or just want a cozy fall treat to make with the kids, Pumpkin Patch Dirt Cups fit the bill.
Save this one for busy days when you need something simple, cozy, and family-friendly.
Quick Recipe Snapshot
- Prep time: 15 minutes
- Cook time: No-bake (just chill)
- Total time: 45 minutes
- Servings: 6 cups
- Difficulty level: Beginner
- Best for: Halloween parties, Thanksgiving gatherings, fall snack time
- Main method: Layering, no-bake
- Flavor profile: Rich chocolate, sweet vanilla-orange, crunchy cookie “dirt”
Table of Contents
Why You’ll Love This Pumpkin Patch Dirt Cups Recipe
- No oven required, so it’s perfect for warm afternoons or busy weeknights
- Simple pantry ingredients: pudding mix, milk, Oreos, and candy
- Kids can help crush cookies and build their own cups
- Make-ahead friendly for parties and potlucks
- Looks impressive with almost no effort
- Easy to double for a crowd
What Makes This Recipe Work
The magic of Pumpkin Patch Dirt Cups comes down to contrast. The pudding is smooth and creamy, the crushed Oreos add a satisfying crunch, and the bright candy pumpkins bring a pop of color and sweetness. Layering chocolate pudding with orange-tinted vanilla pudding gives that classic “dirt and pumpkin patch” look without any special skills. Since everything sets in the fridge rather than the oven, there’s very little room for error, which makes this one of the easiest fall desserts you can hand off to a beginner cook.
Ingredients You’ll Need
- Instant chocolate pudding mix (2 boxes, 3.9 oz each): Forms the rich “dirt” base layer and sets quickly without cooking.
- Cold whole milk (4 cups): Whisked into the pudding mix to create that thick, creamy texture.
- Chocolate sandwich cookies (1 package, 14.3 oz): Crushed into crumbs for the “dirt” layer and topping. Any brand works.
- Instant vanilla pudding mix (1 box, 3.9 oz): Creates the lighter, pumpkin-colored layer.
- Orange gel food coloring: A few drops turn plain vanilla pudding into a cheerful pumpkin-patch orange.
- Whipped topping (8 oz tub, thawed): Folded into the pudding for a lighter, fluffier texture.
- Mellowcreme candy pumpkins: The fun, festive topper that makes these Pumpkin Patch Dirt Cups so charming.
- Green sour straw candy (optional): Cut into short pieces for a “pumpkin vine” garnish.
Ingredient Notes and Easy Swaps
- No instant pudding on hand? Homemade stovetop pudding works too, though it adds extra time.
- Swap Oreos for any chocolate sandwich cookie, gluten-free versions included.
- If you don’t have orange gel coloring, liquid food coloring works, though it may thin the pudding slightly.
- Skip the whipped topping if you prefer a denser, richer pudding texture — just don’t skip the milk ratio, since that affects how well the pudding sets.
- Gummy worms can be swapped in for or added alongside the candy pumpkins for extra Halloween flair.
How to Make Pumpkin Patch Dirt Cups
- Crush the cookies. Place the chocolate sandwich cookies in a zip-top bag and crush with a rolling pin, or pulse in a food processor until you get fine crumbs with a few small chunks left for texture.
- Make the chocolate pudding. In a large bowl, whisk the chocolate pudding mix with 2 cups of the cold milk for about 2 minutes, until it thickens and turns glossy.
- Make the vanilla pudding. In a separate bowl, whisk the vanilla pudding mix with the remaining 2 cups of cold milk. Once it starts to thicken, stir in a few drops of orange gel coloring until it reaches a warm pumpkin hue.
- Fold in the whipped topping. Gently fold half of the whipped topping into the chocolate pudding and the other half into the orange pudding. Fold lightly to keep the texture airy rather than stirring vigorously.
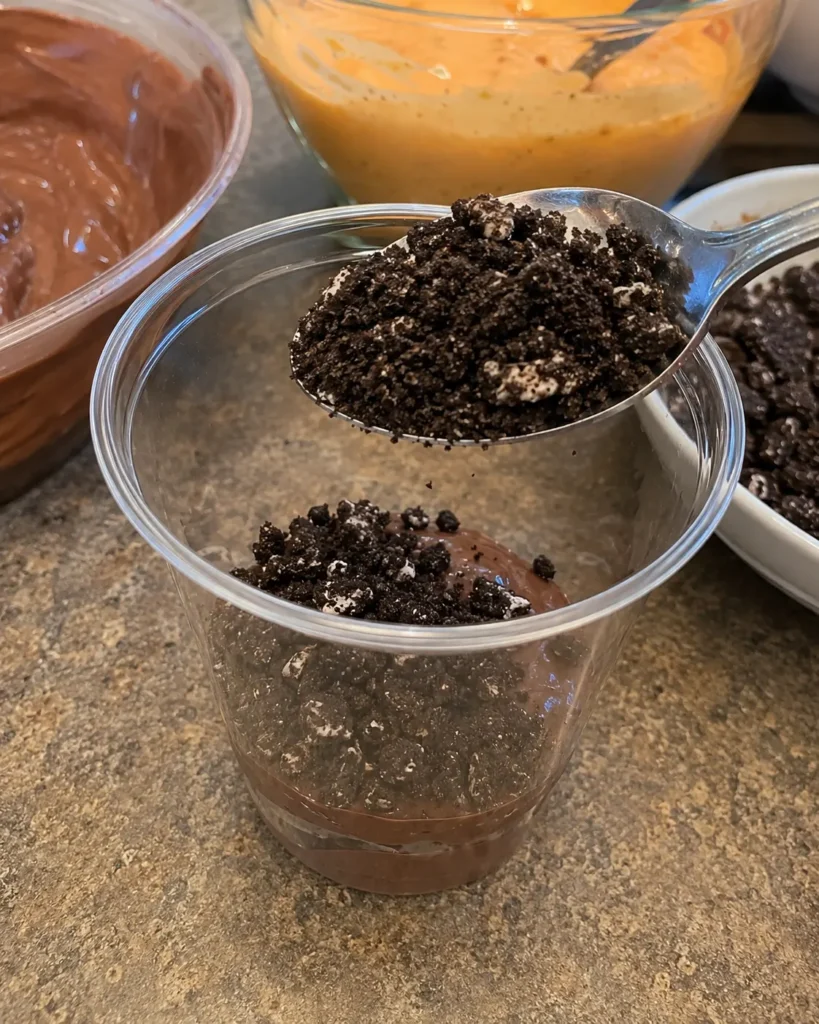
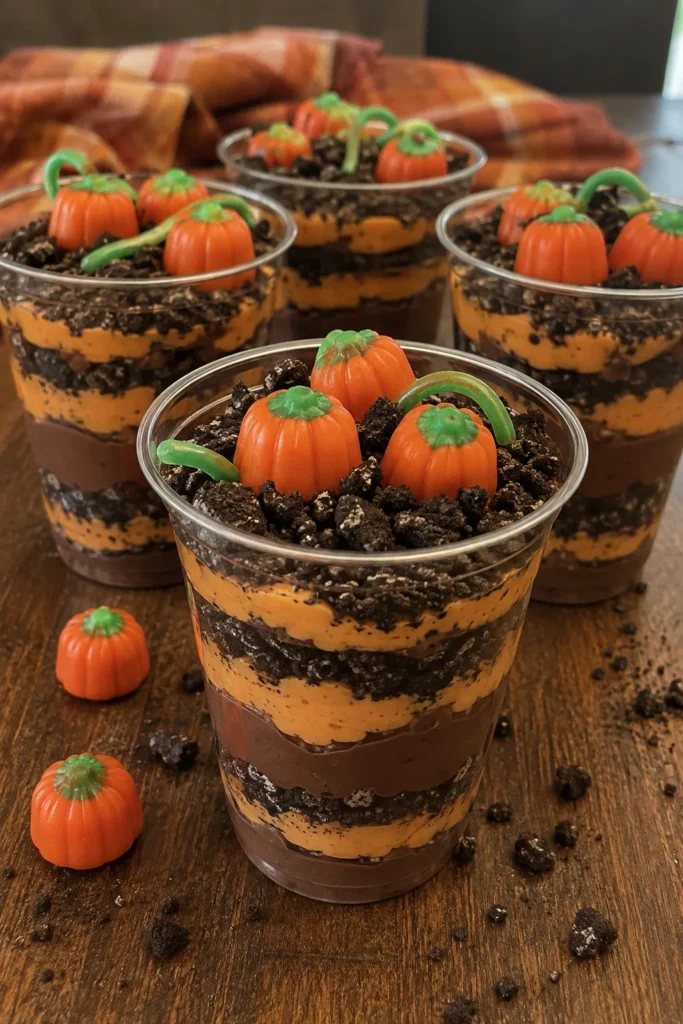
- Layer the cups. Spoon a thin layer of Oreo crumbs into the bottom of each cup. Add a layer of chocolate pudding, then a sprinkle of crumbs, then a layer of orange pudding, and top with a final layer of crumbs.
- Add the toppings. Press a green sour straw piece into the top for a vine, then nestle a few candy pumpkins on top like they’re sitting in a real patch.
- Chill. Refrigerate the cups for at least 30 minutes so the layers firm up and hold their shape when scooped.
You’ll know your Pumpkin Patch Dirt Cups are ready when the pudding layers look set and glossy rather than runny, and the Oreo crumbs on top look dark and slightly matte from chilling.
Beginner Tips for Best Results
- Use cold milk straight from the fridge — pudding sets faster and thicker that way.
- Whisk pudding for the full 2 minutes even if it looks thick sooner; this helps it set properly.
- Fold whipped topping in gently with a spatula rather than a whisk to avoid deflating it.
- Use clear plastic cups or glasses so the layers show through — it’s part of the fun.
- Add the candy toppings right before serving so they stay crisp and don’t get soggy.
Common Mistakes to Avoid
- Using warm milk: This slows down the setting process and can leave pudding runny. Stick with cold milk straight from the fridge.
- Crushing Oreos too finely: A fine powder can look muddy. Leave a few small chunks for texture.
- Skipping the chill time: Cutting the 30-minute chill short means the layers won’t hold together when scooped.
- Overmixing the whipped topping: Stirring too hard deflates it, making the pudding dense instead of light and fluffy.
Easy Variations
- Extra chocolatey: Use chocolate pudding for every layer and skip the orange vanilla pudding.
- Kid-friendly: Add gummy worms alongside the candy pumpkins for a fun surprise.
- Lighter version: Use sugar-free pudding mix and light whipped topping.
- Holiday twist: Swap the pumpkin candies for candy corn or fall-colored sprinkles for a Thanksgiving table.
- Dairy-free: Use dairy-free pudding mix, plant-based milk, and coconut whipped topping.
What to Serve With Pumpkin Patch Dirt Cups
These little cups are rich enough to stand on their own, but they’re also a great addition to a fall dessert table alongside pumpkin spice cookies or chocolate chip pumpkin bread. For a Halloween party spread, pair them with Halloween whoopie pies and a warm mug of slow cooker apple cider.
Make-Ahead Tips
You can crush the Oreos and prepare both pudding mixtures up to a day ahead, storing them separately in the fridge. Assemble the cups the morning of your event so the layers stay crisp and distinct, then chill until ready to serve. This makes Pumpkin Patch Dirt Cups an easy make-ahead option for busy hosting days.
How to Store Pumpkin Patch Dirt Cups
Cover the cups tightly with plastic wrap or a lid and store them in the refrigerator for up to 3 days. The cookie crumbs will soften slightly over time, but the flavor stays just as good.
Can You Freeze Pumpkin Patch Dirt Cups?
Freezing is not recommended for this recipe. The pudding and whipped topping mixture doesn’t hold up well once thawed — it tends to separate and turn watery, and the Oreo crumbs lose their crunch. For the best texture, plan to make and enjoy these within a few days.
How to Reheat
No reheating needed here — Pumpkin Patch Dirt Cups are meant to be served cold, straight from the fridge. If they’ve been sitting at room temperature for a party, just pop any leftovers back in the fridge to firm back up before serving again.
Nutrition Notes
Pumpkin Patch Dirt Cups are a sweet, indulgent treat best enjoyed in moderation. Exact nutrition values will vary depending on the specific pudding mix, milk, and toppings you use, so if you need precise numbers, plug your ingredients into a nutrition calculator. This recipe is not intended as a health food, but it’s a fun way to celebrate the season.
Frequently Asked Questions
Can I make Pumpkin Patch Dirt Cups the night before?
Yes, they hold up well overnight in the fridge. Just add the candy toppings closer to serving time so they stay fresh and don’t get soggy.
Do I have to use instant pudding?
No, homemade stovetop pudding works too, though instant pudding is faster and more beginner-friendly for this recipe.
Can I make this recipe without food coloring?
Absolutely. Skip the orange coloring and use plain vanilla pudding, or make the whole recipe with only chocolate pudding.
What size cups work best?
Clear plastic cups or small glasses around 8–9 ounces work well, letting the pudding layers show through nicely.
Are Pumpkin Patch Dirt Cups safe to leave out at a party?
Since these contain dairy-based pudding, they shouldn’t sit at room temperature for more than 2 hours. Keep them chilled until serving.
Can I make a bigger batch for a crowd?
Yes, this recipe scales easily. Just double or triple the ingredients and use a large trifle dish instead of individual cups if you prefer.
What other candy can I use besides mellowcreme pumpkins?
Candy corn, gummy worms, or even chocolate chips all work well as substitutes or additions.
Final Thoughts
Pumpkin Patch Dirt Cups are one of those desserts that feels a lot fancier than the effort it takes to make. With just a handful of ingredients and no oven required, they’re an easy way to bring a little fall charm to your next gathering. Give them a try — your family (and your Halloween party guests) will be asking for the recipe.
Print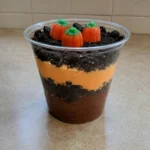
Pumpkin Patch Dirt Cups
- Total Time: 45 minutes
- Yield: 6 cups 1x
- Diet: Vegetarian
Description
A fun, no-bake fall dessert made with layers of chocolate and orange-tinted vanilla pudding, crushed Oreo “dirt,” and candy pumpkins. Ready in just 15 minutes of prep.
Ingredients
2 boxes (3.9 oz each) instant chocolate pudding mix
4 cups cold whole milk
1 package (14.3 oz) chocolate sandwich cookies, crushed
1 box (3.9 oz) instant vanilla pudding mix
Orange gel food coloring
1 tub (8 oz) whipped topping, thawed
Mellowcreme candy pumpkins
Green sour straw candy, cut into pieces (optional)
Instructions
1. Crush the chocolate sandwich cookies into fine crumbs, leaving a few small chunks for texture.
2. Whisk the chocolate pudding mix with 2 cups of cold milk for about 2 minutes until thickened and glossy.
3. In a separate bowl, whisk the vanilla pudding mix with the remaining 2 cups of cold milk, then stir in a few drops of orange gel coloring until it reaches a pumpkin hue.
4. Gently fold half of the whipped topping into the chocolate pudding and the other half into the orange pudding.
5. Spoon a thin layer of Oreo crumbs into the bottom of each cup, followed by a layer of chocolate pudding, more crumbs, a layer of orange pudding, and a final layer of crumbs.
6. Press a piece of green sour straw into the top of each cup for a vine, then nestle a few candy pumpkins on top.
7. Refrigerate the cups for at least 30 minutes so the layers set before serving.
Notes
Add candy toppings right before serving so they stay crisp and don’t get soggy.
Not recommended for freezing, as the pudding and whipped topping mixture separates and turns watery once thawed.
Store covered in the refrigerator for up to 3 days.
Since these contain dairy-based pudding, don’t leave them at room temperature for more than 2 hours.
- Prep Time: 15 minutes
- Cook Time: 0 minutes
- Category: Dessert
- Method: No-Bake
- Cuisine: American
Nutrition
- Serving Size: 1 cup
- Calories: 350 kcal
- Sugar: 32g
- Sodium: 420mg
- Fat: 15g
- Saturated Fat: 9g
- Unsaturated Fat: 5g
- Trans Fat: 0g
- Carbohydrates: 49g
- Fiber: 2g
- Protein: 5g
- Cholesterol: 10mg
Print and Save This Pumpkin Patch Dirt Cups
If this recipe fits your fall hosting routine, print it or save it so you can come back to it the next time you need a quick, no-bake dessert for a party or classroom treat.