
There’s something magical about the smell of freshly baked bread filling the kitchen. For me, it always brings back memories of my grandma’s home — warm countertops, floured hands, and dough rising patiently on the table while stories floated through the air. Baking bread has always felt like a little ritual of love, and this honey oat sourdough loaf is one of my favorites to make. It’s slow, comforting, and deeply rewarding — the kind of bread that feels like home in every slice.
Table of Contents
Table of Contents
Quick Overview Honey Oat Sourdough Bread
This honey oat sourdough bread feels warm, lightly sweet, and wonderfully nourishing with every bite. The oats add a hearty texture, the honey brings a subtle warmth, and the sourdough delivers that signature tang and chew. It’s perfect for buttered toast, sandwiches, or dunking into a comforting bowl of soup — and while it feels artisan, it’s absolutely achievable at home with a little patience.
Prep Time: 15 minutes
Bake Time: 45 minutes
Total Time: About 1 hour (plus rising)
Yield: 1 rustic loaf
Skill Level: Intermediate
What Is Honey Oat Sourdough Bread?
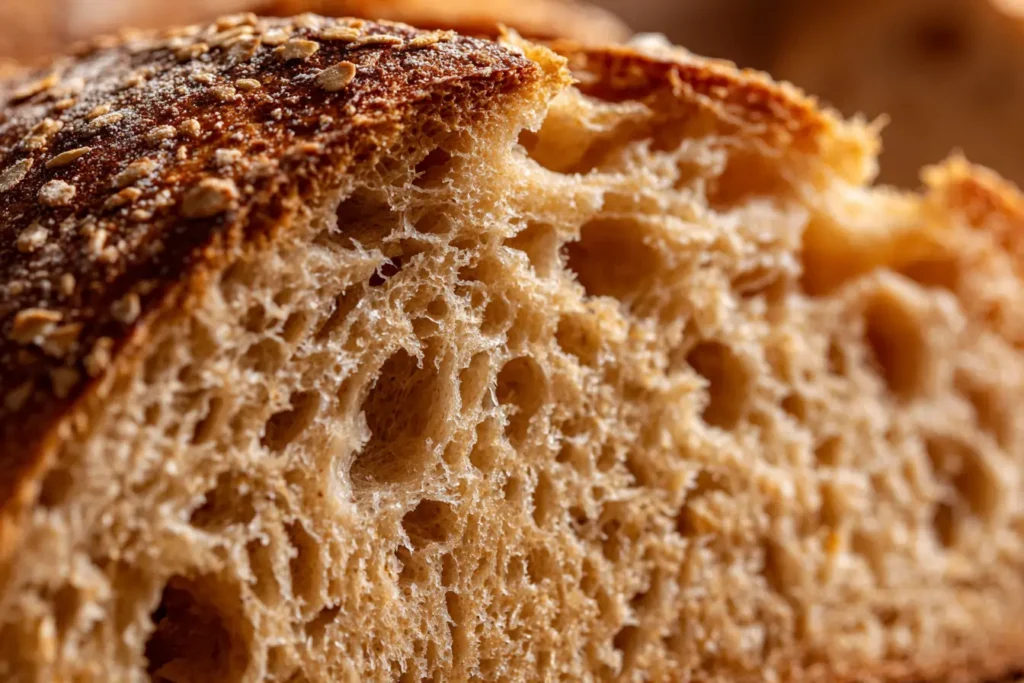
Honey oat sourdough bread is the cozy “in-between” loaf I reach for when I want something wholesome and comforting. It has the signature tang and chew of sourdough, but the rolled oats soften the crumb and make each slice feel hearty, almost like a warm sweater you can eat. A little honey doesn’t make the bread sugary — it simply rounds out the sour notes and gives the crust a deeper, prettier golden color in the oven.
What makes it special:
- Natural fermentation from an active starter (flavor + structure)
- Rolled oats for a rustic, tender bite
- Honey for gentle sweetness and better browning
- Mixed flours (bread + whole wheat) for strength and depth
Quick “feel” guide (not complicated, I promise):
| Feature | Honey Oat Sourdough | Classic Sourdough |
|---|---|---|
| Flavor | Tangy + softly sweet | More tang-forward |
| Texture | Hearty, slightly chewy | Chewy, open crumb |
| Best for | Toast + sandwiches | Dipping + artisan slices |
If you’re new to sourdough timing and “starter moods,” King Arthur Baking has a super clear starter guide that’s beginner-friendly.
And if you love cozy breakfast baking on Elodie Recipes, this loaf pairs beautifully with Cinnamon Roll Pancakes with Icing.
Sourdough vs. Regular Yeast Bread
The main difference between sourdough and regular yeast bread is the leavening agent. Sourdough uses a natural starter culture to ferment the dough, while regular yeast breads use commercial yeast. This gives sourdough a more complex flavor and a slightly chewier texture.
Why You’ll Love This Honey Oat Sourdough Bread
This loaf isn’t just bread — it’s comfort baked into every slice. Here’s why it’s a favorite:
- Soft, chewy, and beautifully rustic
- Lightly sweet with warm, nutty oat flavor
- Perfect for toast, sandwiches, or soup dunking
- Naturally fermented for deeper flavor
- Great for make-ahead baking and freezing
- Feels homemade, wholesome, and special every time
It’s the kind of bread that makes your kitchen smell amazing and your mornings feel slower and sweeter.
Print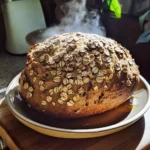
HONEY OAT SOURDOUGH BREAD RECIPE
- Total Time: 60 minutes
- Yield: 1 loaf
- Diet: Vegetarian
Description
This Honey Oat Sourdough Bread is cozy, gently sweet, and perfectly chewy—made with rolled oats, a touch of honey, and an active sourdough starter. It’s wonderful toasted with butter, used for sandwiches, or served alongside soups and stews.
Ingredients
– 1 cup active sourdough starter (bubbly and ready to use)
– 1 1/2 cups water (lukewarm)
– 1/4 cup honey
– 1 cup rolled oats
– 3 cups bread flour
– 1 cup whole wheat flour
– 2 teaspoons salt
Instructions
1. In a large bowl, whisk together the sourdough starter, water, and honey until smooth.
2. Stir in the rolled oats, bread flour, whole wheat flour, and salt until a shaggy dough forms.
3. Knead on a lightly floured surface for 5–10 minutes, until the dough looks smoother and feels elastic (it should still be slightly tacky).
4. Place the dough in a lightly greased bowl, cover, and let it rise at room temperature for 8–12 hours, or until puffy and nearly doubled.
5. Gently shape the dough into a round loaf and place it seam-side down in a parchment-lined Dutch oven (or an oven-safe pot with a lid).
6. Cover and let rise for 1–2 hours, until the dough looks pillowy and slowly springs back when gently pressed.
7. Preheat the oven to 450°F (230°C). Score the top of the loaf with a sharp knife or bread lame.
8. Bake covered for 20 minutes, then remove the lid and bake 20–25 minutes more, until deep golden brown.
9. Cool completely on a wire rack before slicing (this helps the crumb set and improves texture).
Notes
– Starter tip: Use a truly active, bubbly starter for the best rise and flavor.
– Storage: Keep at room temperature (paper bag or clean towel) for 3–5 days, or freeze sliced for up to 3 months.
– Reheating: Warm slices in a toaster, or refresh the loaf in a 350°F (175°C) oven for 5–10 minutes.
– Nutrition note: Nutrition values are estimates and will vary based on ingredients and slice size.
- Prep Time: 15 minutes
- Cook Time: 45 minutes
- Category: 🍞 Bread & Baking
- Method: Baking
- Cuisine: American
Nutrition
- Serving Size: 1 slice
- Calories: 170 kcal
- Sugar: 4g
- Sodium: 220mg
- Fat: 3g
- Saturated Fat: 0.5g
- Unsaturated Fat: 2.5g
- Trans Fat: 0g
- Carbohydrates: 33g
- Fiber: 4g
- Protein: 6g
- Cholesterol: 0mg
Ingredients Honey Oat Sourdough Bread (And Why They Matter)
This honey oat sourdough bread relies on a handful of simple ingredients, but each one plays an important role in flavor, texture, and structure. When you understand why each ingredient matters, it becomes easier to troubleshoot, customize, and bake with confidence.
Here’s what goes into this loaf — and why it works:
- Active sourdough starter — The heart of the recipe. It naturally leavens the dough, adds tangy depth, and creates that signature chewy crumb.
- Rolled oats — Bring a hearty, rustic texture and a gentle nutty flavor. They also help make the crumb more tender and satisfying.
- Honey — Softens the sourdough tang with subtle sweetness while helping the crust brown beautifully in the oven.
- Bread flour — Provides strength and structure thanks to its higher protein content, giving the loaf a good rise and chew.
- Whole wheat flour — Adds warmth, depth, and a slightly earthy flavor that pairs perfectly with oats and honey.
- Salt — improves flavor balance and supports gluten formation, giving the bread better texture.
- Water — activates the flour and encourages fermentation, shaping both the taste and texture of the bread.
Helpful tip: Always use a bubbly, active starter — it’s the key to a well-risen, flavorful loaf.
Honey Oat Sourdough Bread — Ingredient Swaps
| Needs | Swap | Why |
|---|---|---|
| Bread flour | All-purpose flour | AP flour has a slightly lower protein content, so the texture may be a bit more tender. |
| Whole wheat flour | Rye flour | Rye flour will add a deeper, earthier flavor. |
| Honey | Maple syrup | Maple syrup has a similar sweetness but a more pronounced flavor. |
| Rolled oats | Steel-cut oats | Steel-cut oats will have a more pronounced texture and nutty taste. |
Honey Oat Sourdough Bread — Tools You’ll Need
- Mixing bowls
- Dough whisk or wooden spoon
- Kitchen scale (optional, but highly recommended)
- Parchment paper or silicone baking mat
- Dutch oven or lidded baking dish
- Bread lame or sharp knife (for scoring)
How to Make Honey Oat Sourdough Bread (Step-by-Step)
Making sourdough is less about rushing and more about patience, gentle handling, and paying attention to your dough. Think of it as a slow, calming rhythm rather than a strict recipe — your dough will tell you when it’s ready.
Step 1 — Mix the Dough
In a large bowl, combine your sourdough starter, water, honey, oats, flours, and salt. Stir until a shaggy, sticky dough forms. Once combined, knead for about 5–10 minutes until the dough feels smoother, elastic, and slightly springy.
Step 2 — First Rise (Bulk Fermentation)
Place the dough in a lightly greased bowl, cover it, and let it rest at room temperature for 8–12 hours. By the end, it should look puffed, airy, and nearly doubled in size.
Step 3 — Shape the Loaf
Gently shape the dough into a round loaf, keeping as much air inside as possible. Place it in a parchment-lined Dutch oven or baking dish.
Step 4 — Second Rise
Let it rise again until soft, pillowy, and slightly jiggly when nudged.
Step 5 — Bake
Score the top, bake covered at 450°F (230°C), then uncover to finish until the crust turns deep golden and crisp.
Remember: Beautiful sourdough comes from time, not perfection.

Honey Oat Sourdough Bread Nutrition Notes
This honey oat sourdough bread is a “feel-good” loaf — hearty, satisfying, and a little more wholesome than standard white sandwich bread. Because it uses whole grains (oats + whole wheat), you’ll naturally get more fiber than many basic loaves, which can help you feel full and satisfied. And thanks to sourdough fermentation, the flavor becomes deeper and more complex (that gentle tang we all love).
That said, nutrition can vary a lot depending on the exact flour blend, how much honey you use, and how thick you slice your bread. If you’re tracking macros or sodium, the most accurate way is to calculate using your specific ingredients and serving size.
What to expect (general guide):
- Carbs: bread is carb-forward (that’s normal — it’s bread!)
- Fiber: higher when using whole wheat + oats
- Sugar: usually modest (honey adds a little, but not dessert-level)
- Sodium: depends on your salt amount and slice size
If you’d like a simple refresher on how to read nutrition labels and Daily Values, the FDA explains it clearly.
The Secret to Extra Flavorful Honey Oat Sourdough (Little Baker Rituals)
One of my favorite parts about baking honey oat sourdough bread is that it rewards small, thoughtful touches. These tiny “baker rituals” don’t make the recipe harder — they simply make the loaf taste more special, more developed, and more like something you’d find in a charming neighborhood bakery.
A few simple ways to elevate your loaf:
- Toast the oats lightly before mixing — this deepens their nutty flavor and adds warmth to every bite
- Use warm (not hot) water — it helps encourage gentle fermentation without stressing your starter
- Let the dough rest longer if you can — slow fermentation builds richer flavor and a softer crumb
- Brush the crust with honey water after baking — this adds a soft shine and subtle sweetness
- Listen to the crust — that faint crackling sound as it cools means you nailed it
Flavor upgrades if you love cozy notes:
- A pinch of cinnamon for warmth
- A splash of vanilla for bakery-style aroma
- A drizzle of extra honey for a slightly sweeter loaf
Sourdough isn’t just baking — it’s a slow, calming rhythm. The more love and patience you pour into the process, the more your bread gives back in flavor, texture, and comfort.
Honey Oat Sourdough Bread Variations
Once you bake this loaf once, the fun part begins — little tweaks that make it feel brand new without changing the cozy soul of the bread. I like to think of variations as “bread moods.” Same comfort, different vibe.
Easy mix-ins (add during mixing):
- Seeds (2–3 Tbsp): sunflower, sesame, flax
- Warm spice: cinnamon + a pinch of nutmeg
- Dried fruit (½ cup): raisins or chopped dates
- Citrus touch: orange zest (bright + bakery-style)
Flavor swaps (simple + reliable):
| If you want… | Swap | Why it works |
|---|---|---|
| Deeper sweetness | Maple syrup instead of honey | Similar moisture + cozy flavor |
| More earthy notes | Rye flour for some whole wheat | Boosts “old-world” bread flavor |
| Softer crumb | Use more rolled oats (small increase) | Adds tenderness and heartiness |
Savory version idea: fold in chopped rosemary + black pepper, then serve it with something comforting like Slow Cooker Amish Pot Roast.
For extra sourdough technique inspiration (like shaping and fermentation tips), The Perfect Loaf is a trusted deep-dive resource.
Honey Oat Sourdough Bread Serving Ideas
This loaf keeps best when you treat it like real bakery bread: let it breathe a little, and only seal it tightly when you’re freezing. Sourdough crust can soften if it’s trapped in plastic too soon, so I like storing it cut-side down on a board for the first day, then moving it to a bread bag or wrap.
Best storage options:
- Room temperature (3–5 days): paper bag or clean towel (keeps crust nicer)
- Freeze (up to ~3 months for best quality): slice first, then freeze in a well-sealed bag
- Avoid the fridge: it tends to dry bread out faster than the counter
Reheating (my cozy favorites):
- Whole/partial loaf: warm in the oven until softened inside and crisp outside
- Slices: toast until the edges crisp and the center warms
My favorite cozy ways to serve it:
- Toasted with butter + sea salt (simple, perfect)
- Jam + yogurt on the side (try it with Strawberry Yogurt Pops with Granola).
- Open-faced sandwich base with protein + crunch
- Soup sidekick for dunking and scooping
If you’d like a guide on bread storage and freezing (so your loaf stays dreamy), USDA’s food storage basics are a reliable reference. and satisfying meal.

Honey Oat Sourdough Bread — Storage & Reheating
This loaf keeps best when you treat it like real bakery bread: let it breathe a little, and only seal it tightly when you’re freezing. Sourdough crust can soften if it’s trapped in plastic too soon, so I like storing it cut-side down on a board for the first day, then moving it to a bread bag or wrap.
Best storage options:
- Room temperature (3–5 days): paper bag or clean towel (keeps crust nicer)
- Freeze (up to ~3 months for best quality): slice first, then freeze in a well-sealed bag
- Avoid the fridge: it tends to dry bread out faster than the counter
Reheating (my cozy favorites):
- Slices: toast until the edges crisp and the center warms
- Whole/partial loaf: warm in the oven until softened inside and crisp outside
For safe reheating rules (especially if you’re warming foods from frozen or reheating alongside leftovers), USDA explains recommended reheating methods and temperatures here.
If you want, I can also write a tiny “Freezing Slices the Right Way” mini-guide (5 bullets) to paste under this section.
Honey Oat Sourdough Bread — FAQ’s
Can I use all-purpose flour instead of bread flour for honey oat sourdough bread?
Yes, all-purpose flour works if you don’t have bread flour on hand. The loaf may turn out slightly softer and less chewy, since bread flour has more protein to support structure. If you prefer a heartier crumb, a blend of all-purpose and whole wheat flour is a great compromise.
How do I know when sourdough bread is fully proofed?
Your dough is ready when it looks puffy, airy, and nearly doubled in size. A gentle finger press should leave a dent that slowly springs back. If it snaps back quickly, it needs more time; if it collapses, it may be over-proofed.
Why is my honey oat sourdough bread dense or heavy?
Dense sourdough usually comes from:
– An inactive starter
– Under-proofing (not enough rise time)
– Over-proofing (structure weakened)
– Dough that wasn’t developed enough
Make sure your starter is bubbly and active, and give the dough enough time to rise at a warm room temperature.
Can I bake honey oat sourdough bread without a Dutch oven?
Absolutely. A Dutch oven helps trap steam for a crisp crust, but you can also bake on a preheated baking stone, sheet pan, or in any oven-safe covered pot. Adding steam during the first 15 minutes of baking also improves crust texture.
How do I get a crispy sourdough crust?
For the best crust:
– Bake with steam or a covered pot at first
– Finish baking uncovered
– Let the loaf cool fully before slicing
The crust firms up as moisture escapes during cooling — patience really pays off here.
Honey Oat Sourdough Bread — Final Thoughts
This honey oat sourdough bread is slow, comforting, and deeply satisfying to make. From the gentle rise of the dough to the crackle of the crust fresh from the oven, every step feels rewarding. The tang of sourdough, the warmth of honey, and the heartiness of oats come together in a loaf that feels both nostalgic and special.
Whether you enjoy it toasted in the morning, stacked into sandwiches, or served alongside soup on a cozy evening, this bread is sure to become a recipe you return to again and again.
Happy baking — and don’t forget to savor the process as much as the final slice.
for more recipes follow me in Facebook, Pinterest and medium.