I have a soft spot for no bake avalanche cookies, especially on days when the oven feels like too much commitment. My kitchen is already warm, my patience is limited, and dessert needs to happen now — not after preheating, baking, and waiting. 😅
The first time I made no bake avalanche cookies, it was one of those “someone might stop by” afternoons. I melted white chocolate, tossed everything together, and hoped for the best. What came out was crunchy, sweet, and completely addictive — the kind of cookie you keep “testing” until half the tray mysteriously disappears.
Since then, these no bake avalanche cookies have become one of my favorite cozy kitchen wins: easy, comforting, and always a crowd-pleaser.
Table of Contents
Table of Contents
What Are No Bake Avalanche Cookies?
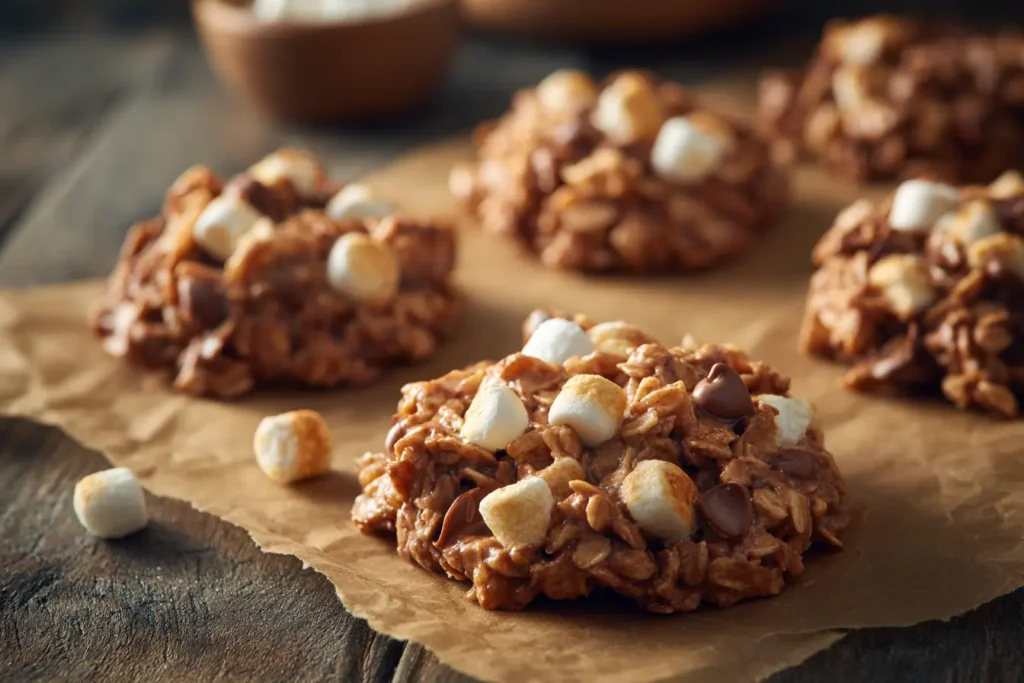
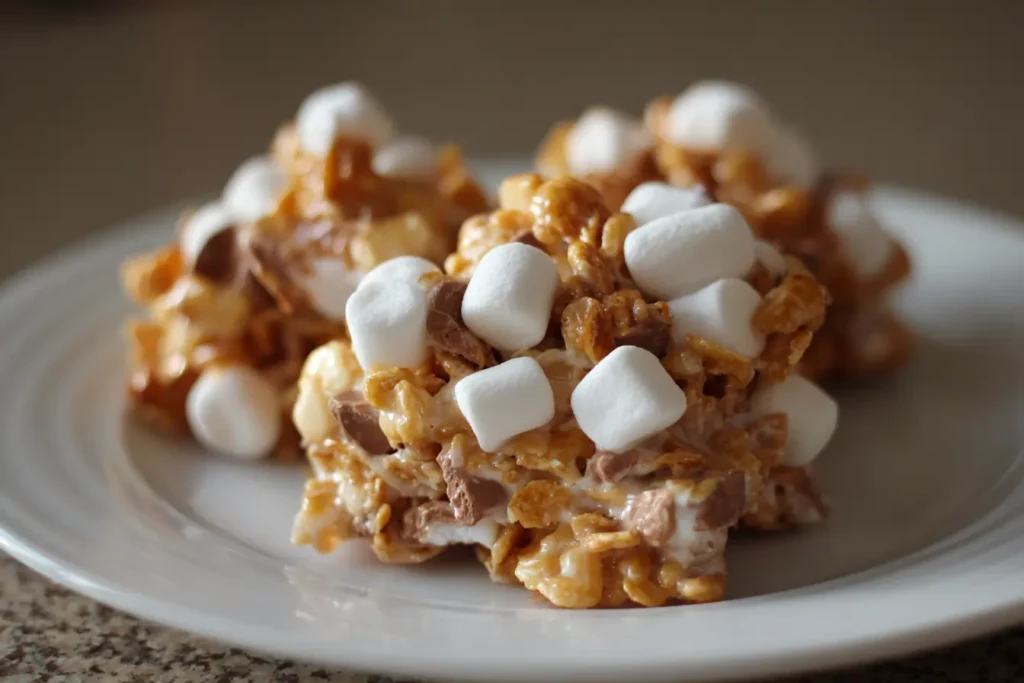
No bake avalanche cookies are easy, no-oven cookies made by mixing melted white chocolate, peanut butter, crunchy cereal, and soft marshmallows, then letting everything set at room temperature. There’s no baking, no candy thermometer, and no waiting for the oven to preheat — just simple ingredients coming together fast.
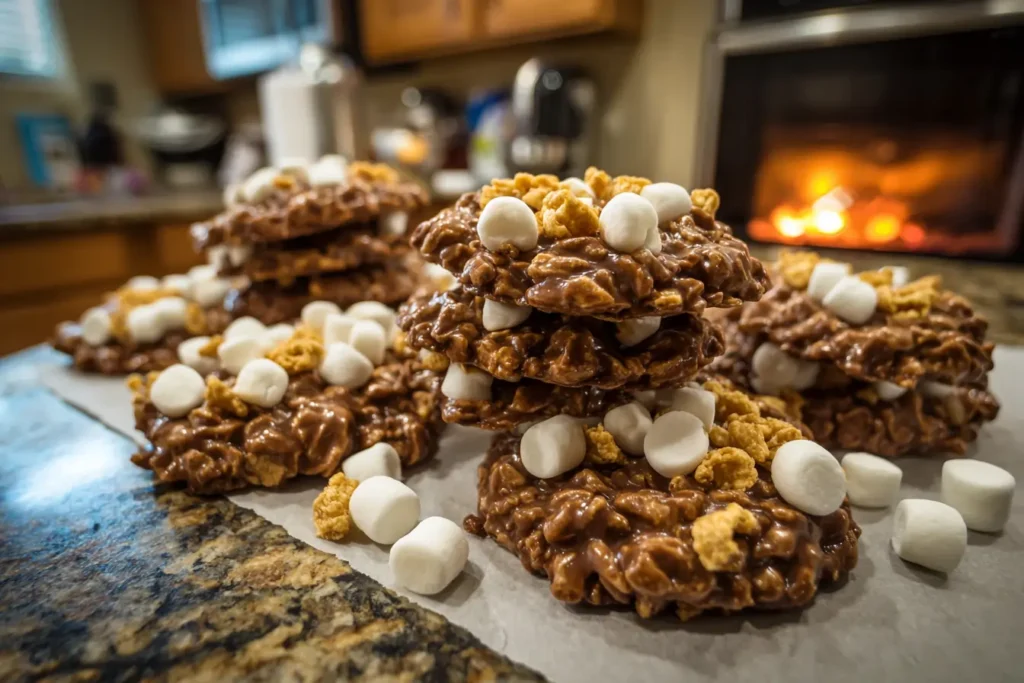
They get their name from the way everything tumbles together in one bowl, like a sweet little avalanche. Once scooped, the cookies set into chunky clusters that are crunchy, chewy, and perfectly sweet.
If you enjoy quick, no-oven treats like these, you’ll also love my no-bake preacher cookies — another cozy classic that’s just as easy.
Avalanche Cookies vs Classic No-Bake Cookies
While both are no-bake desserts, they’re made very differently. Here’s a quick comparison:
| Avalanche Cookies | Classic No-Bake Cookies |
|---|---|
| Made with white chocolate | Made with cocoa + sugar |
| No cooking sugar mixture | Requires stovetop cooking |
| Light, creamy flavor | Rich, chocolatey flavor |
| Cornflakes or rice cereal | Oats |
| Very beginner-friendly | Timing-sensitive |
Because no bake avalanche cookies don’t rely on boiling sugar, they’re faster and less stressful — especially if you’re new to no-bake desserts.
Why This Recipe Is Beginner-Friendly
This recipe works so well for beginners because:
- There’s no baking temperature to manage
- No eggs or raw dough
- The ingredients help each other set naturally
- You can see and feel when it’s ready
If you’ve ever been nervous about no-bake desserts, this is a great place to start. And if you like white chocolate treats, you might also enjoy these white chocolate pretzel clusters — they use a very similar melt-and-mix method.
Print
No Bake Avalanche Cookies
- Total Time: 20 minutes + setting time
- Yield: 12–16 cookies 1x
- Diet: Vegetarian
Description
These No Bake Avalanche Cookies are sweet, crunchy, and incredibly easy to make. With creamy white chocolate, peanut butter, crispy cereal, and soft marshmallows, they come together in minutes — no oven required. Perfect for busy days, parties, or whenever you need a quick, cozy dessert that always works.
Ingredients
-
12 oz white chocolate chips or chopped white chocolate
-
½ cup creamy peanut butter
-
4 cups cornflakes (or Rice Krispies)
-
1½ cups mini marshmallows
Optional add-ins:
-
¼ cup chopped nuts
-
¼ cup mini chocolate chips
-
Sprinkles for topping
Instructions
-
Line a baking sheet with parchment paper and set aside.
-
Melt the white chocolate gently in a heatproof bowl or saucepan over low heat, stirring often until smooth.
-
Remove from heat and stir in the peanut butter until fully combined and creamy.
-
Gently fold in the cereal until evenly coated.
-
Let the mixture cool slightly, then fold in the mini marshmallows.
-
Scoop spoonfuls of the mixture onto the prepared baking sheet, forming chunky clusters.
-
Let the cookies sit at room temperature for 20–30 minutes, or until fully set.
-
Enjoy once firm, or store for later.
Notes
-
Melt white chocolate slowly to avoid seizing.
-
Add marshmallows only after the mixture cools slightly so they stay fluffy.
-
Cornflakes give a hearty crunch; Rice Krispies make lighter cookies.
-
For nut-free cookies, swap peanut butter with sunflower seed butter.
- Prep Time: 15 minutes
- Cook Time: 5 minutes
- Category: Dessert
- Method: No-bake
- Cuisine: American
Nutrition
- Serving Size: 1 cookie
- Calories: 155 kcal
- Sugar: 14 g
- Sodium: 75 mg
- Fat: 8 g
- Saturated Fat: 3.5 g
- Unsaturated Fat: 4 g
- Trans Fat: 0 g
- Carbohydrates: 20 g
- Fiber: 1 g
- Protein: 3 g
- Cholesterol: 5 mg
Ingredients You’ll Need (And Why They Matter)
One of the reasons no bake avalanche cookies are so reliable is that every ingredient has a job. When you understand why each one is there, it’s much easier to get perfect results every time.
Core Ingredients
These are the essentials — don’t skip them:
- White chocolate
This is the base that holds everything together. Once melted and cooled, it firms up and gives the cookies structure and sweetness. - Peanut butter
Think of peanut butter as the glue. It adds flavor, richness, and helps the cookies set without becoming hard or crumbly. - Cereal (cornflakes or Rice Krispies)
This is where the crunch comes from. Cornflakes give a hearty, classic texture, while Rice Krispies make the cookies lighter and crispier. - Mini marshmallows
These add chewiness and that signature avalanche cookie look. They should stay soft, not melted.
If you enjoy cookies where peanut butter plays a starring role, you might also like these keto peanut butter cookies — a great option when you’re craving that nutty flavor.
Cornflakes vs Rice Krispies: Which Should You Use?
Both work beautifully, but they create slightly different cookies.
| Cereal | Texture | Best For |
|---|---|---|
| Cornflakes | Thicker, crunchier | Classic avalanche cookies |
| Rice Krispies | Lighter, crisp | Delicate, airy clusters |
There’s no wrong choice here — it really comes down to the texture you love most.
White Chocolate vs Almond Bark (Quick Comparison)
If white chocolate feels intimidating, almond bark is a very beginner-friendly alternative.
| Option | Flavor | Ease of Use |
|---|---|---|
| White chocolate | Creamy, rich | Needs gentle heat |
| Almond bark | Mild, sweet | Very forgiving |
Both will work for no bake avalanche cookies, so choose what feels most comfortable for you.
Optional Add-Ins (Use Lightly)
You can customize the cookies with small extras like:
- Chopped nuts
- Mini chocolate chips
- Pretzel pieces
- Holiday sprinkles
Just don’t overload the mixture — too many add-ins can affect how the cookies set.
Tools You’ll Need (Quick & Simple)
You don’t need anything fancy to make no bake avalanche cookies — just a few everyday kitchen tools.
What you’ll need:
- A heatproof bowl or saucepan (for melting the chocolate)
- A silicone spatula (great for folding without crushing)
- Measuring cups
- A baking sheet or large tray
- Parchment paper (for easy release)
Optional but helpful:
- A cookie scoop or spoon for even sizing
Quick Prep Tip
Line your tray and measure everything before melting the chocolate. Once it’s melted, the recipe moves fast.
How to Make No Bake Avalanche Cookies (Step-by-Step)
Once you start, these no bake avalanche cookies come together quickly. The key is gentle heat and adding everything in the right order.
Step 1: Melt the White Chocolate
Place the white chocolate in a heatproof bowl or saucepan and melt it gently, stirring often.
What you should see:
- Smooth, glossy, fully melted chocolate
- No lumps, no grainy texture
Low heat is important here — white chocolate prefers patience.
Step 2: Stir in the Peanut Butter
Remove the melted chocolate from the heat and immediately stir in the peanut butter until fully combined.
What you should see:
- Thick but pourable mixture
- Creamy and evenly blended
This step adds flavor and helps the cookies set properly.
Step 3: Fold in the Cereal
Add the cereal and gently fold it into the mixture.
Tips for this step:
- Fold slowly to avoid crushing the cereal
- Make sure everything is evenly coated
What you should see:
- A thick, scoopable mixture
- No dry cereal pockets
Step 4: Add the Marshmallows
Let the mixture cool slightly, then fold in the mini marshmallows.
Why timing matters:
If the mixture is too hot, the marshmallows will melt instead of staying fluffy.
Step 5: Scoop and Shape
Drop generous spoonfuls of the mixture onto the lined baking sheet.
Helpful tips:
- Use a cookie scoop or spoon
- Leave a little space between cookies
- Don’t press them flat — clusters are the goal
Step 6: Let the Cookies Set
Allow the cookies to rest at room temperature until they set.
What to expect:
- They will gradually firm up as the chocolate sets
- Texture should be crunchy outside, chewy inside
Once the cookies have set, they’re ready to be enjoyed.
Pro Tips for Perfect Texture (Crunchy + Chewy)
These quick tips help your no bake avalanche cookies turn out just right — no overthinking needed.
- Melt white chocolate gently
Low heat keeps it smooth and creamy, not grainy. - Fold the cereal slowly
Gentle folding prevents crushed cereal and keeps the crunch. - Let the mixture cool slightly before marshmallows
Warm is fine — hot will melt them. - Scoop, don’t flatten
Chunky mounds set better and look more like classic avalanche cookies. - Use parchment paper
It releases cleanly once the cookies are set.
Quick Check Before Scooping
The mixture should be thick, fully coated, and scoopable — not runny, not dry.
Variations & Smart Substitutions
One of the best things about no bake avalanche cookies is how flexible they are. These swaps let you customize the cookies without messing up the texture.
Avalanche Cookies Without Peanut Butter
If you need a peanut-free option:
- Use sunflower seed butter or cookie butter
- Keep the amount the same
- Texture stays soft and creamy, just with a different flavor
Almond Bark Version (Beginner-Friendly)
Almond bark is more forgiving than white chocolate.
- Swap white chocolate 1:1 with almond bark
- Melts smoother and sets reliably
- Flavor is slightly milder but still delicious
This is a great option if you’re new to no-bake cookies.
Cornflake-Free Options
No cornflakes? No problem.
| Substitute | Result |
|---|---|
| Rice Krispies | Lighter, crispier cookies |
| Pretzel pieces | Sweet-salty crunch |
| Chex cereal | Airy but sturdy texture |
Choose one — don’t mix too many cereals at once.
Make Them Into Bars
For less scooping:
- Press the mixture into a parchment-lined pan
- Let set completely
- Slice into bars
Same flavor, faster prep, great for parties.
Fun Add-Ins (Use Lightly)
- Mini chocolate chips
- Chopped nuts
- Holiday sprinkles
Stick to 1 add-in at a time so the cookies still set properly.
If you love cluster-style treats like these, you might also enjoy my white chocolate pretzel clusters, which use a similar melt-and-mix method.
Kid-Friendly No-Bake Cooking Guide
No bake avalanche cookies are a great recipe to make with kids because there’s no oven and no complicated steps. It feels fun and safe — which makes everyone happier in the kitchen.
What Kids Can Help With
These are perfect little helper jobs:
- Measuring cereal and marshmallows
- Pouring ingredients into the bowl
- Gently stirring the mixture
- Scooping the cookies onto the tray
Kids love seeing everything come together so quickly.
What Adults Should Handle
To keep things safe:
- Melting the white chocolate
- Stirring while the mixture is hot
- Moving the tray while the cookies set
Once the mixture cools slightly, kids can jump back in.
Why This Is a Great First Recipe
- No oven to worry about
- No raw dough or eggs
- Quick results (less waiting!)
- Easy cleanup
It’s the kind of recipe that builds confidence — and usually disappears fast.
Party & Classroom Tip
For groups:
- Scoop cookies slightly smaller
- Let them set fully before moving
- Store in a single layer until serving
They’re easy to transport and perfect for sharing.
Avalanche Cookies vs Other No-Bake Cookies
All no-bake cookies skip the oven, but no bake avalanche cookies are much simpler than most.
| Avalanche Cookies | Classic No-Bake Cookies |
|---|---|
| White chocolate base | Cocoa + cooked sugar |
| No boiling required | Timing-sensitive stovetop step |
| Crunchy + chewy | Soft and fudgy |
| Cornflakes or rice cereal | Oats |
Because avalanche cookies don’t rely on cooking sugar, they’re faster, easier, and more beginner-friendly.
Which One Should You Choose?
Go with no bake avalanche cookies when you want:
- Less prep and less stress
- A lighter, crunchier texture
- A quick dessert that looks impressive
Nutrition Details (Approximate Per Cookie)
These no bake avalanche cookies are meant to be enjoyed, not over-analyzed. The nutrition values below are estimates and can vary depending on ingredient brands and cookie size.
Estimated Nutrition (Per 1 Cookie)
| Nutrient | Approximate Amount |
|---|---|
| Calories | 140–170 kcal |
| Carbohydrates | 18–22 g |
| Sugar | 12–15 g |
| Fat | 7–9 g |
| Protein | 3–4 g |
| Saturated Fat | 3–4 g |
| Sodium | 60–90 mg |
Values are calculated using standard ingredient data and are meant as a general guide.
How These Numbers Can Change
- Using almond bark instead of white chocolate may slightly lower sugar
- Smaller cookies = lower calories per serving
- Different cereals can affect carbs and fiber
For general guidance on how recipe nutrition is calculated, you can reference how large recipe sites estimate values, like Allrecipes, which uses standard ingredient databases for consistency.
A Friendly Reminder
Nutrition information is provided for convenience only and should be viewed as an estimate. For detailed dietary guidance, always follow recommendations from trusted authorities such as the U.S. Food and Drug Administration.
These cookies are a treat — cozy, sweet, and perfect for enjoying in moderation.
Frequently Asked Questions About No Bake Avalanche Cookies
Why are they called avalanche cookies?
They’re called avalanche cookies because all the ingredients tumble together in one bowl, creating chunky clusters that look like a sweet little avalanche once scooped.
How long do no bake avalanche cookies take to set?
Most no bake avalanche cookies set in about 20–30 minutes at room temperature. Warmer kitchens may take a little longer.
Do avalanche cookies need to be refrigerated?
No, they don’t need refrigeration. They set perfectly at room temperature, as long as the chocolate mixture is melted and mixed correctly.
Why did my white chocolate seize?
White chocolate can seize if it gets too hot or if moisture is introduced. Gentle heat and slow stirring help prevent this.
Can I use almond bark instead of white chocolate?
Yes. Almond bark is more forgiving and melts very smoothly, making it a great option for beginners.
Final Thoughts & Sweet Ending
If you’re looking for a dessert that feels cozy, quick, and completely doable, these no bake avalanche cookies really deliver. They’re the kind of recipe you make once… and then keep coming back to whenever you need something sweet without the stress.
I love how simple they are, how forgiving the process feels, and how happy everyone looks grabbing one from the tray. Whether you make them for a quiet afternoon treat, a last-minute get-together, or a fun kitchen moment with kids, they always feel like a little win.
for more recipes follow me in Facebook, Pinterest and medium.